Building Android and iOS apps
Online Apps Builder
Intro
Online Apps Builder is an online tool that you can use to generate and download your own white-labeled Android and iOS CrossBox apps.
The process is entirely automated and requires no technical knowledge.
The system will generate Android and iOS apps based on the branding profile that is active on your server. This includes the application name, logo (icon), theme, loading animation, the default language, etc.
At the end of the process, you'll have both apps ready for publishing under your name to Google Play and Apple App Store.
Here are some examples of app builts with the Online Apps Builder:
Android:
- https://play.google.com/store/apps/details?id=com.azymcloud.cloudmail
- https://play.google.com/store/apps/details?id=com.mxroute.crossbox
- https://play.google.com/store/apps/details?id=com.bulutmail.suite
iOS:
- https://apps.apple.com/app/id1522254361
- https://apps.apple.com/app/id1490617582
- https://apps.apple.com/app/id1494638876
Benefits
End-users:
- Easy to get started on any Android or iOS powered device with one-click app installation (via Google Play and Apple App Store)
- No complicated IMAP/SMTP/POP3 configuration, only email address, and password are required
- Instant access to
- Chat
- Audio/video calls
- Conferences
- Files
- Contacts
- And many other features
- Real-time push notifications
- Updates automatically
Service Providers:
- Provide Android/iOS users with seamless access to email, chat, calls and conferences, files, and contacts
- Easier customer onboarding
- Better brand exposure with custom Android/iOS apps
- Apps work for all nodes/slaves in the cluster
Requirements
To build smartphone apps you need to have:
- An active CrossBox Cluster
- An active Branding (White-label) Addon
Building
First, log into your crossbox.io account and navigate to Online App Builder.
Create an App
Click on the Create App menu item. You'll see the form as shown in the screenshot:
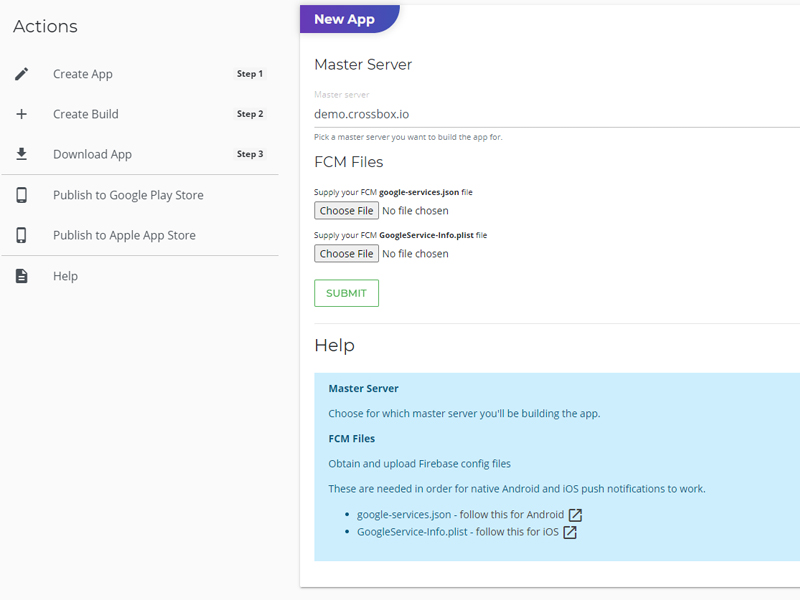
Here, you'll need to fill in:
Master Server
Choose for which master server you'll be building the app.
The app builder will pull the branding profile (app name, logo, theme, etc) from this server to use for generating the apps.
Obtain and upload Firebase config files
These are needed in order for native Android and iOS push notifications to work.
- google-services.json - follow this for Android
- GoogleService-Info.plist - follow this for iOS
Now that both files are on your computer, attach them to the form and click the Submit button.
Submit Build Request
After you've finished creating the app, you can proceed to issue a new build request by clicking the Create Build button:
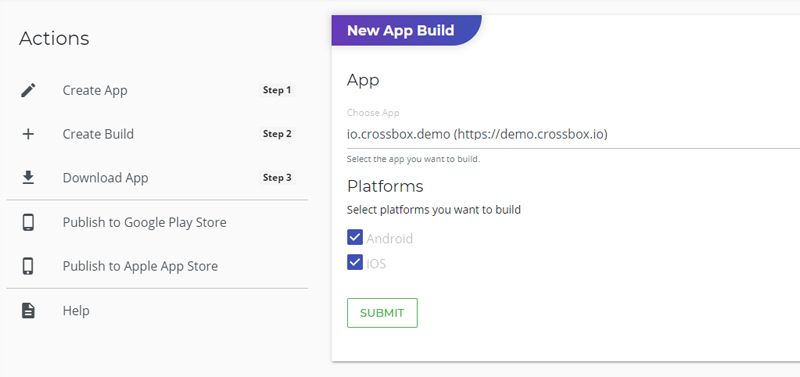
In the form shown above, choose the app you created in the previous step and the platforms that you want to build.
Click the submit button.
You'll get an email notification after the build process is completed.
Download the Apps
Now that the build process completed successfully, you can log in to your crossbox.io account and navigate to the Download App page.
Here you can download android.zip and ios.zip archives to your computer:
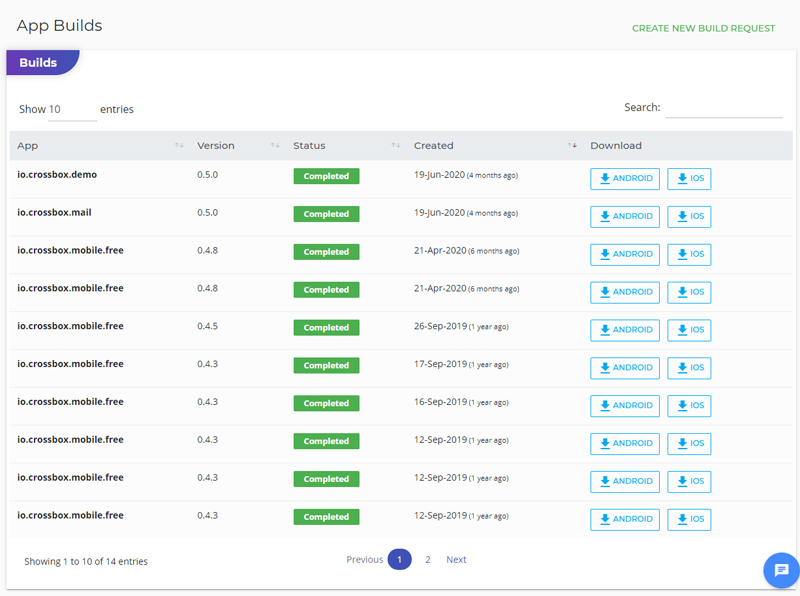
These archives contain both debug and release versions:
- The debug version can be installed onto the devices without signing and is used for testing the app on a device prior to publishing the app to the app stores.
- The release version is a production-ready version which you need to sign and then publish to the respective app stores.
Publish to Stores
Android
Building Requirements
To build an Android app:
- Windows/Linux/macOS
- Google Play Developer Account
- Keytool
- Jarsigner
Download and Install JDK
If you don't already have JDK installed, download and install from the official JDK downloads page.
Generate Keystore
Generate a Keystore file (if you already don't have one).
Use the keytool provided by the JDK:
keytool -genkey -v -keystore my.keystore -keyalg RSA -keysize 2048 -validity 10000 -alias appMake sure to save the generated Keystore file and its password somewhere safe. You'll need them again if you ever decide to republish the app.
Sign
The last step is to sign the app with the previously generated Keystore. This is done using the jarsigner tool provided by JDK.
The Jarsigner tool can be found in:
- Linux and MacOS: /usr/bin/jarsigner
- Windows: jdk/bin/jarsigner.exe
Use it like this:
jarsigner -verbose -sigalg SHA1withRSA -digestalg SHA1 -keystore my.keystore app.aab appThe signed ABB can be verified with:
jarsigner -verify app.abbPublish App to the Google Play Store
Submit the Android app via the Play Store.
iOS
Building Requirements
To build an iOS app:
- macOS latest version
- Xcode latest version
- Apple Developer Account
- Cocoapods
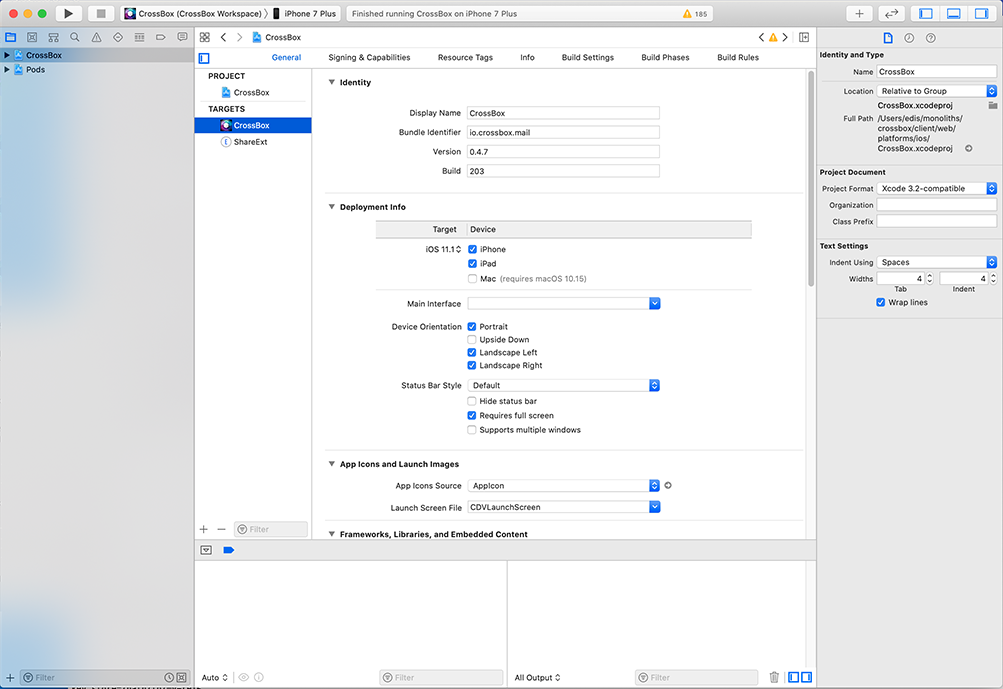
Open the project
Make sure you open the .xcworkspace and not .xcodeproj

Certificates and capabilities
- Click on the First Project in the left side nav
- Go to "Signing and Capabilities"
- Add Capability "Push notifications"
- Add Capability "App Groups"
- Turn off automatic signing for both Debug and Release
- Then turn on automatic signing for both Debug and Release and select your developer account
- Add a group with the name group.my.identifier.shareextension (replace my.identifier with com.yourdomain.app):
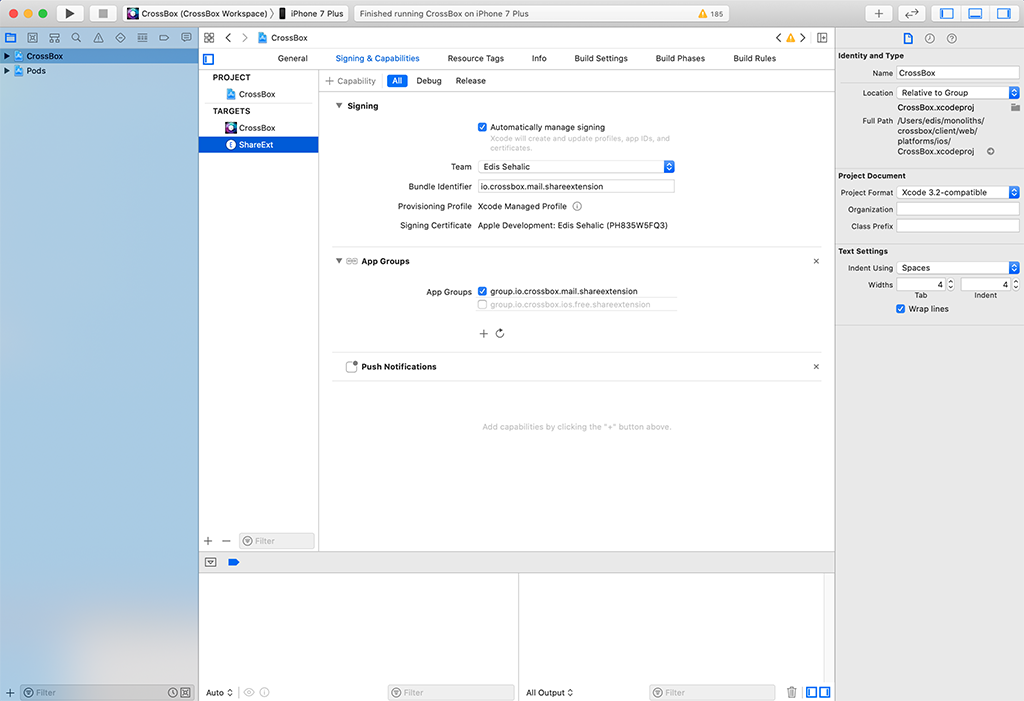
- Click on the First Project in the left side nav
- Go to "Signing and Capabilities":

- Add Capability "App Groups"
- Turn off automatic signing for both Debug and Release
- Then turn on automatic signing for both Debug and Release and select your developer account
- Add a group with the name group.my.identifier.shareextension (replace my.identifier with com.yourdomain.app):
Push Notifications Certificates
- Go to https://developer.apple.com/ and go to Identifiers
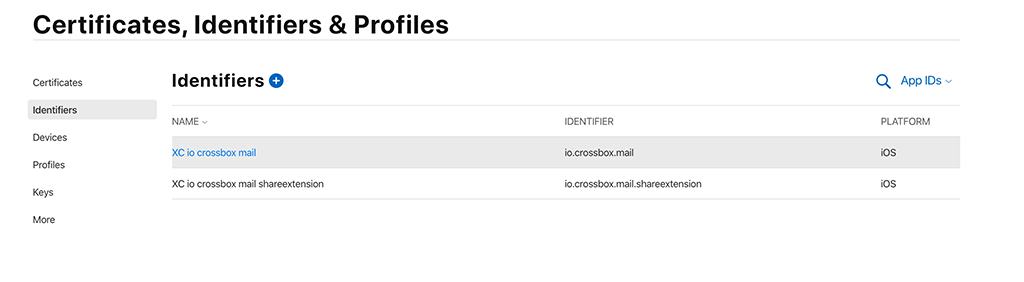
- Select your app identifier and find Push notifications on the list:
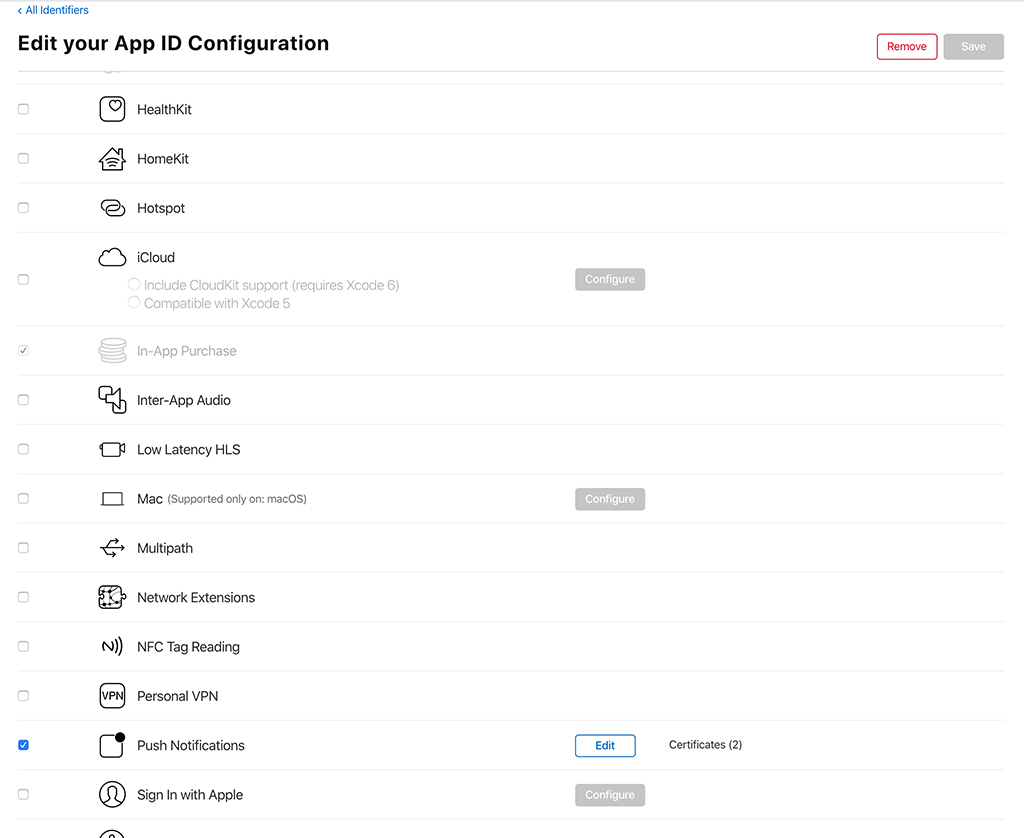
- Create both certificates and download them:
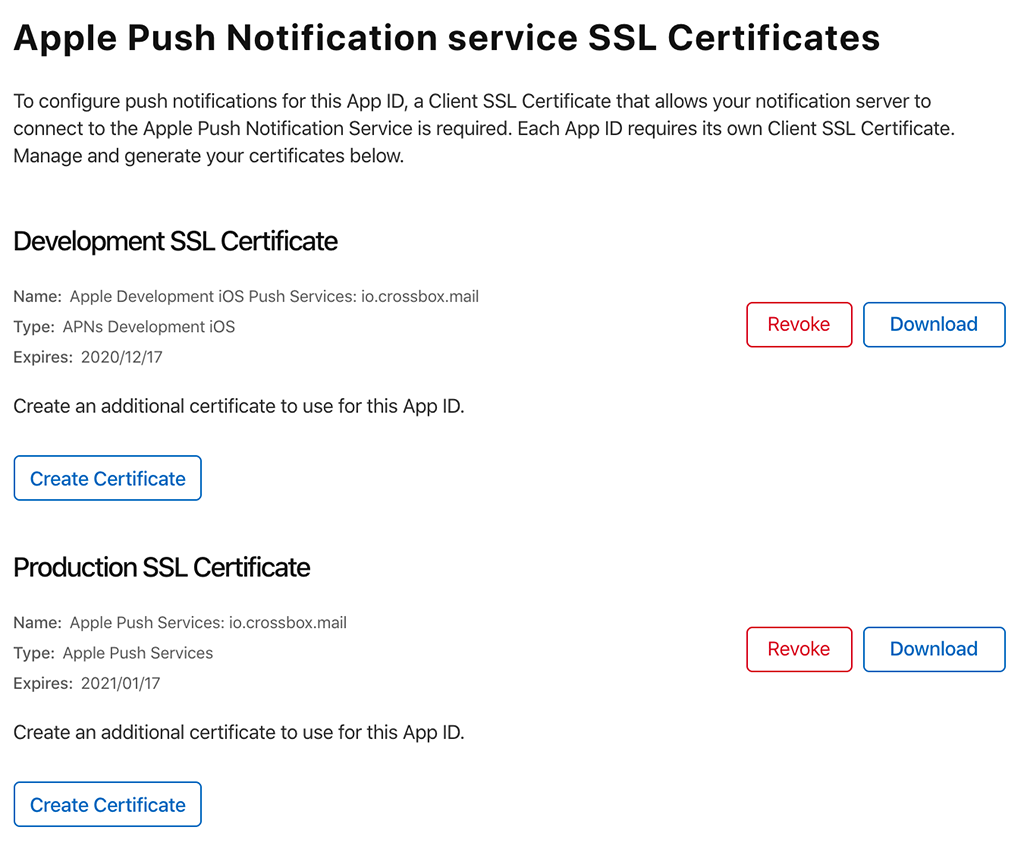
- Double click on the downloaded certificates so they are loaded in the Keychain Access
- Open Keychain Access
- Go to My Certificates
- Find both certificates:
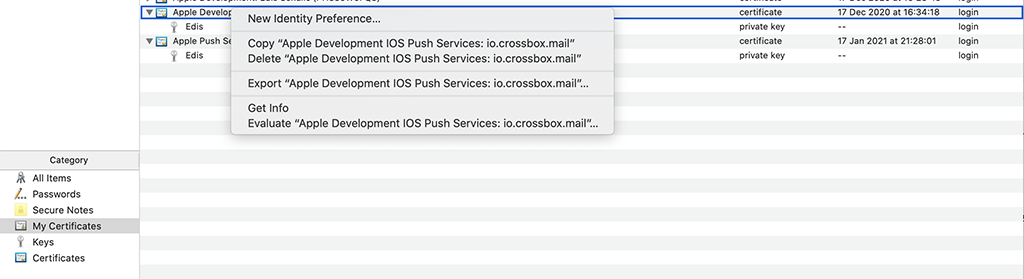
- Click Export and choose .p12 as file format:
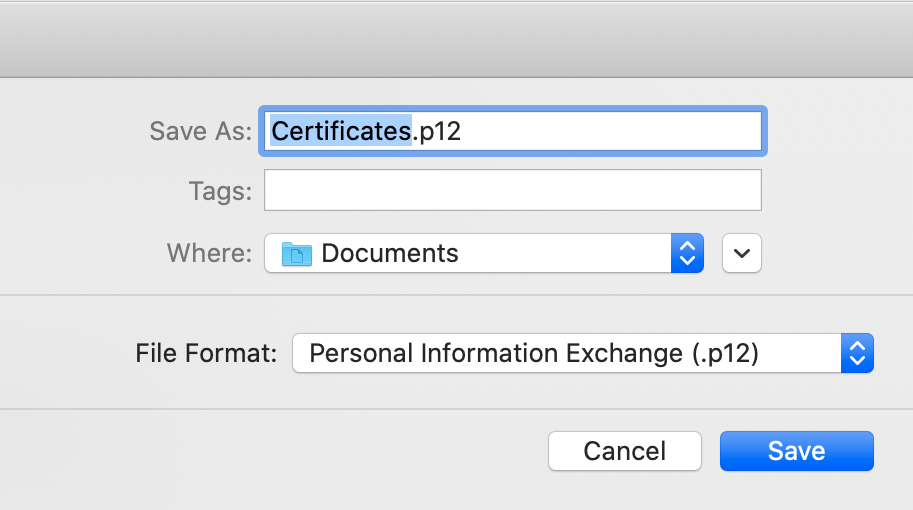
- Make sure you know which certificate is for Development and Production
- Go to Firebase console and go to the project you previously created.
- Open Cloud Settings:
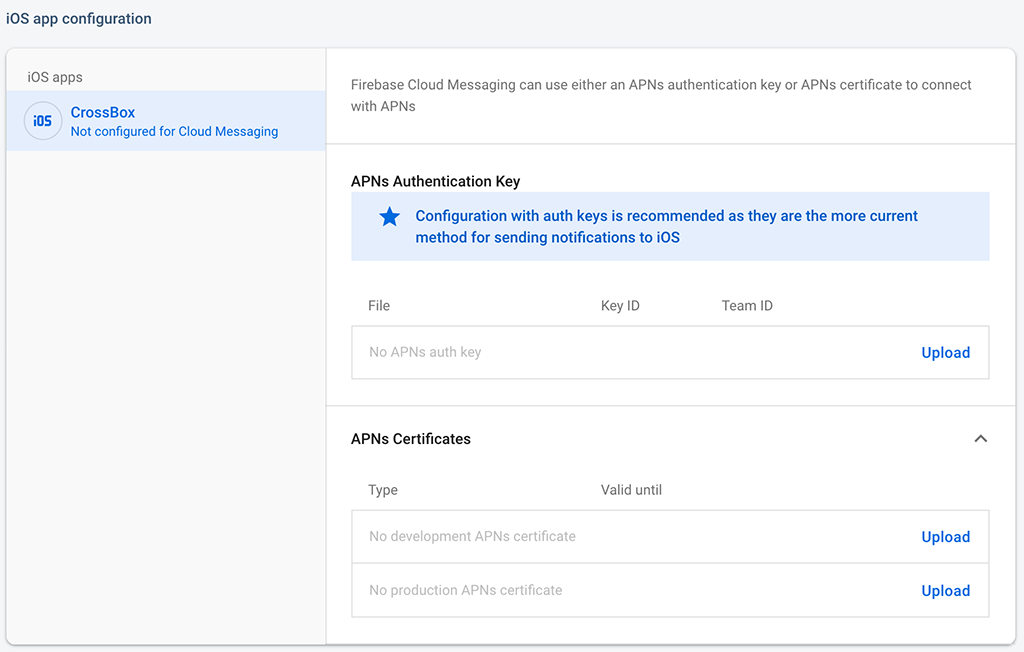
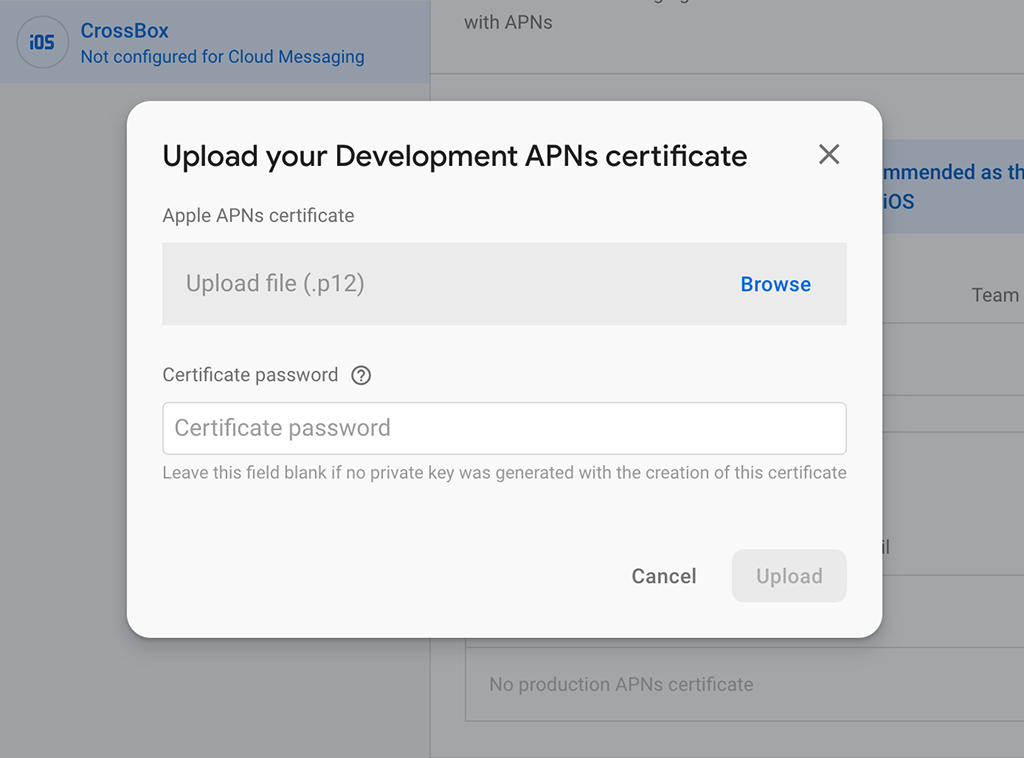
- Upload Production and Development certificates accordingly:

Submission and Testing
- Run the project on the simulator and try logging in
- Use the app and test out if the project has been properly configured
- Open Terminal.app and navigate to the project folder with "cd" command
- Run the command:
sh prepare-production.shThis script prepares the needed libraries for production. You will no longer be able to run the app in the simulator/test device unless you run:
sh prepare-test.shto revert back libraries.
- Go to https://appstoreconnect.apple.com/ and create a new app:
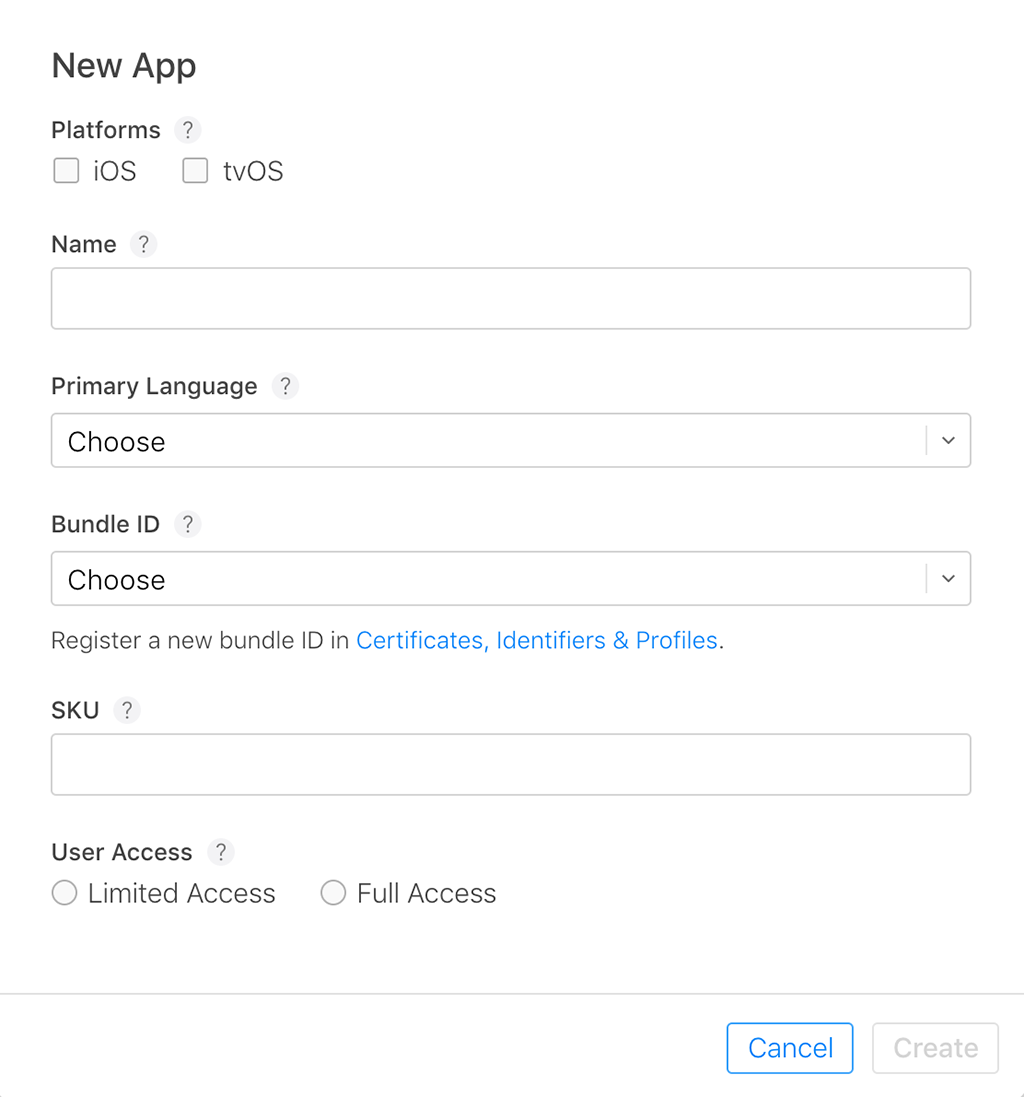
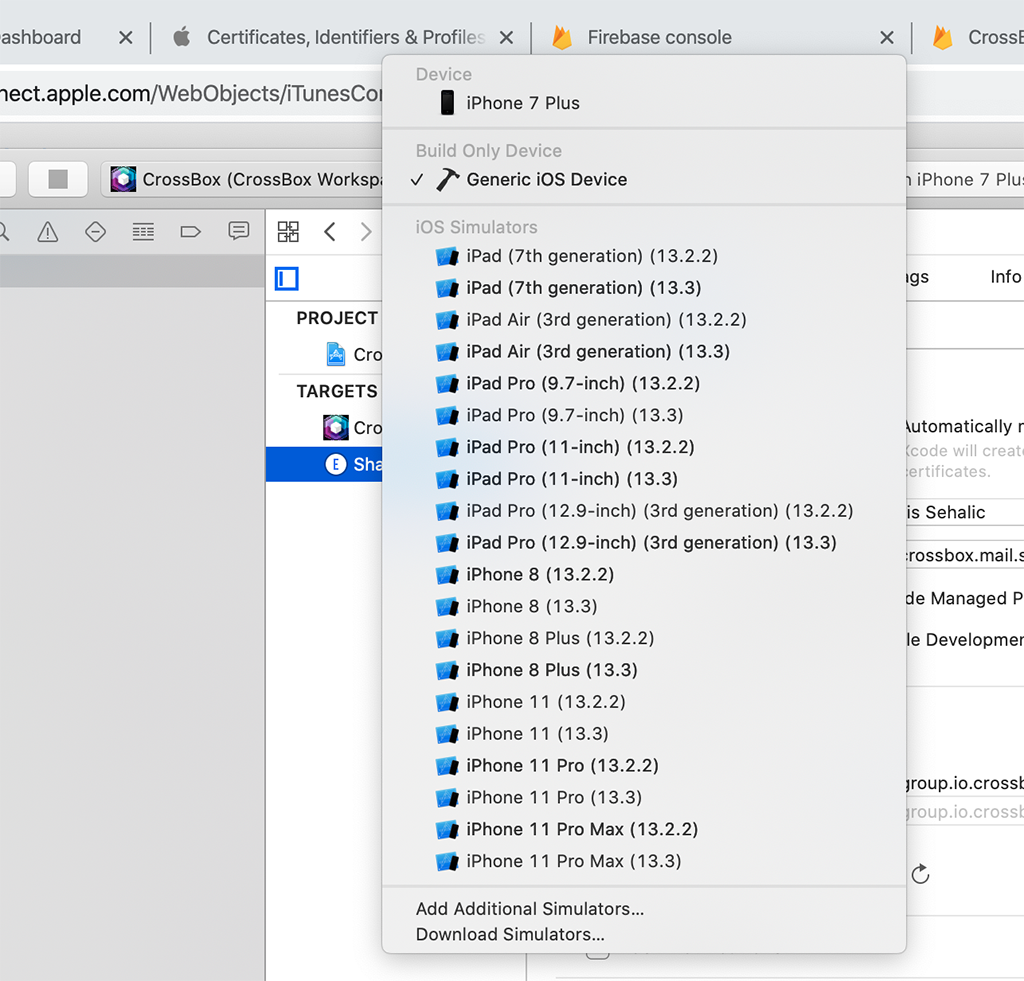
- Go to XCode and select target build "Generic iOS Device"
Distribution
- Make sure you have distribution certificates for your account (you can check if you have them here: https://developer.apple.com/account/resources/certificates/list)
- If the list is empty, create one:

- Pick "Apple Distribution"

- Then, go to https://developer.apple.com/account/resources/profiles/list
Click + and add the profile for your identifiers your_app_id.shareextension and your_app_id for the app store:

- Name your profile so you differentiate it easily by adding a suffix "distribution"
- Click continue to finish the wizard
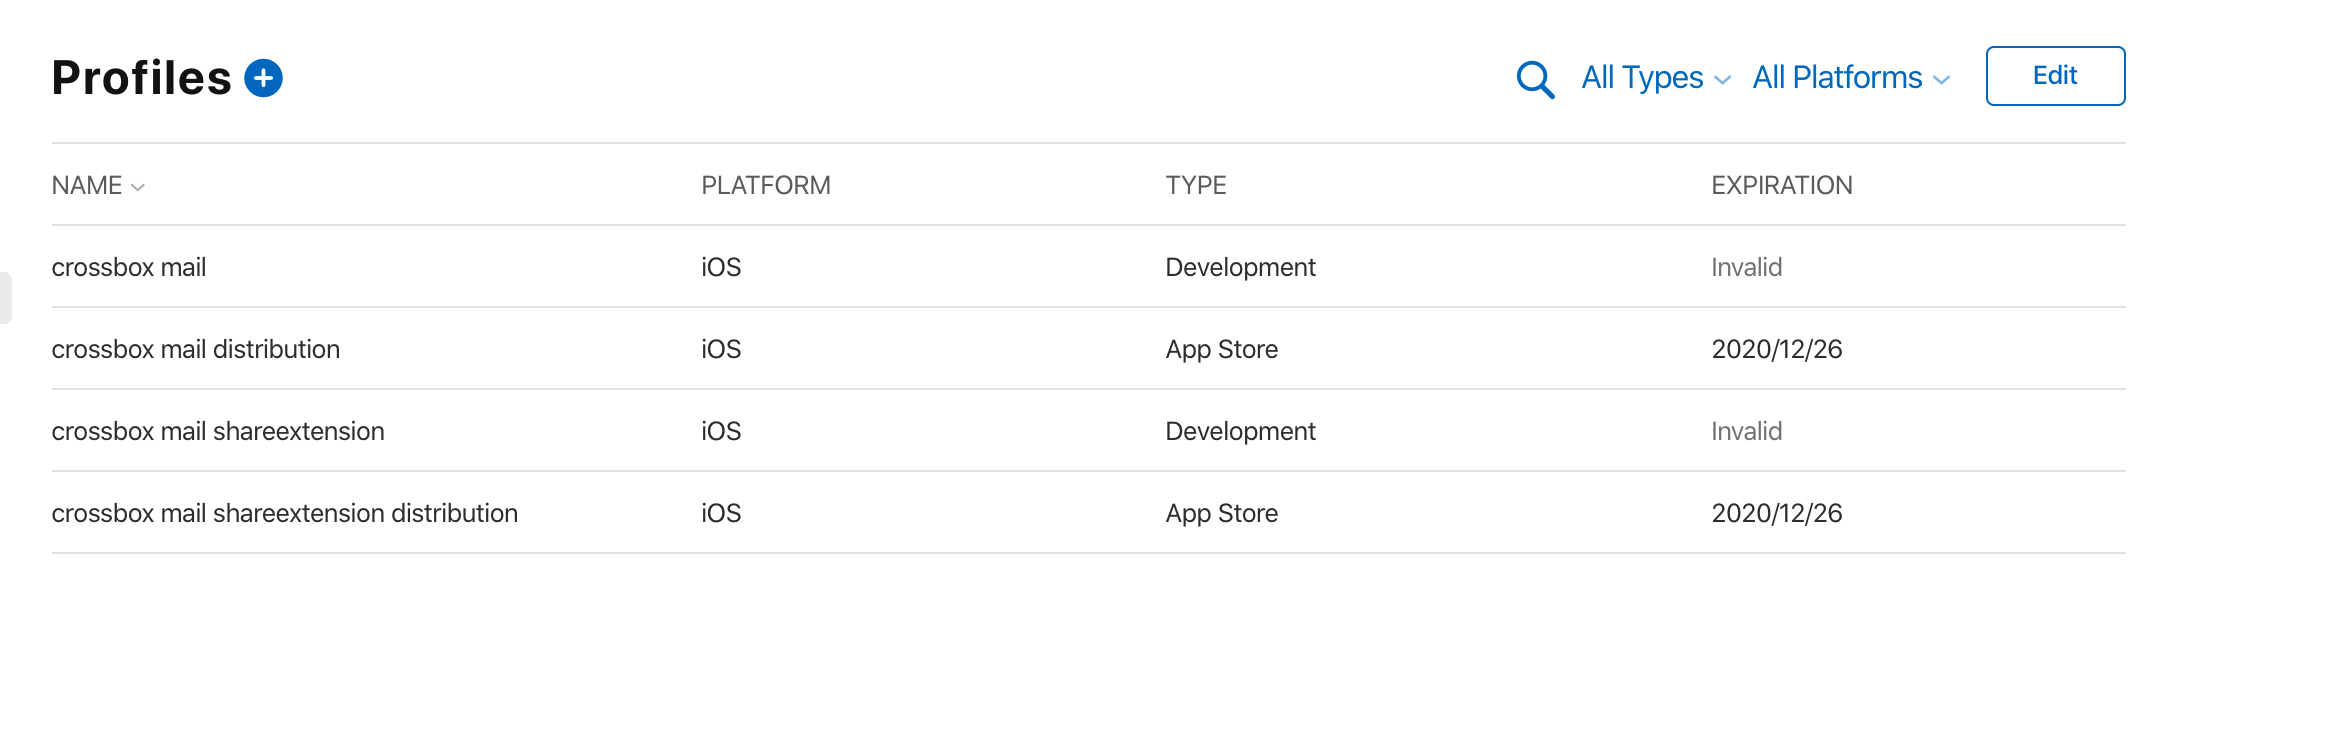
- Make sure you have profiles for both identifiers
Once you have this list of profiles you can proceed with setting up the signing settings
You will have to configure your Debug and Release profiles to match. They should look like this:
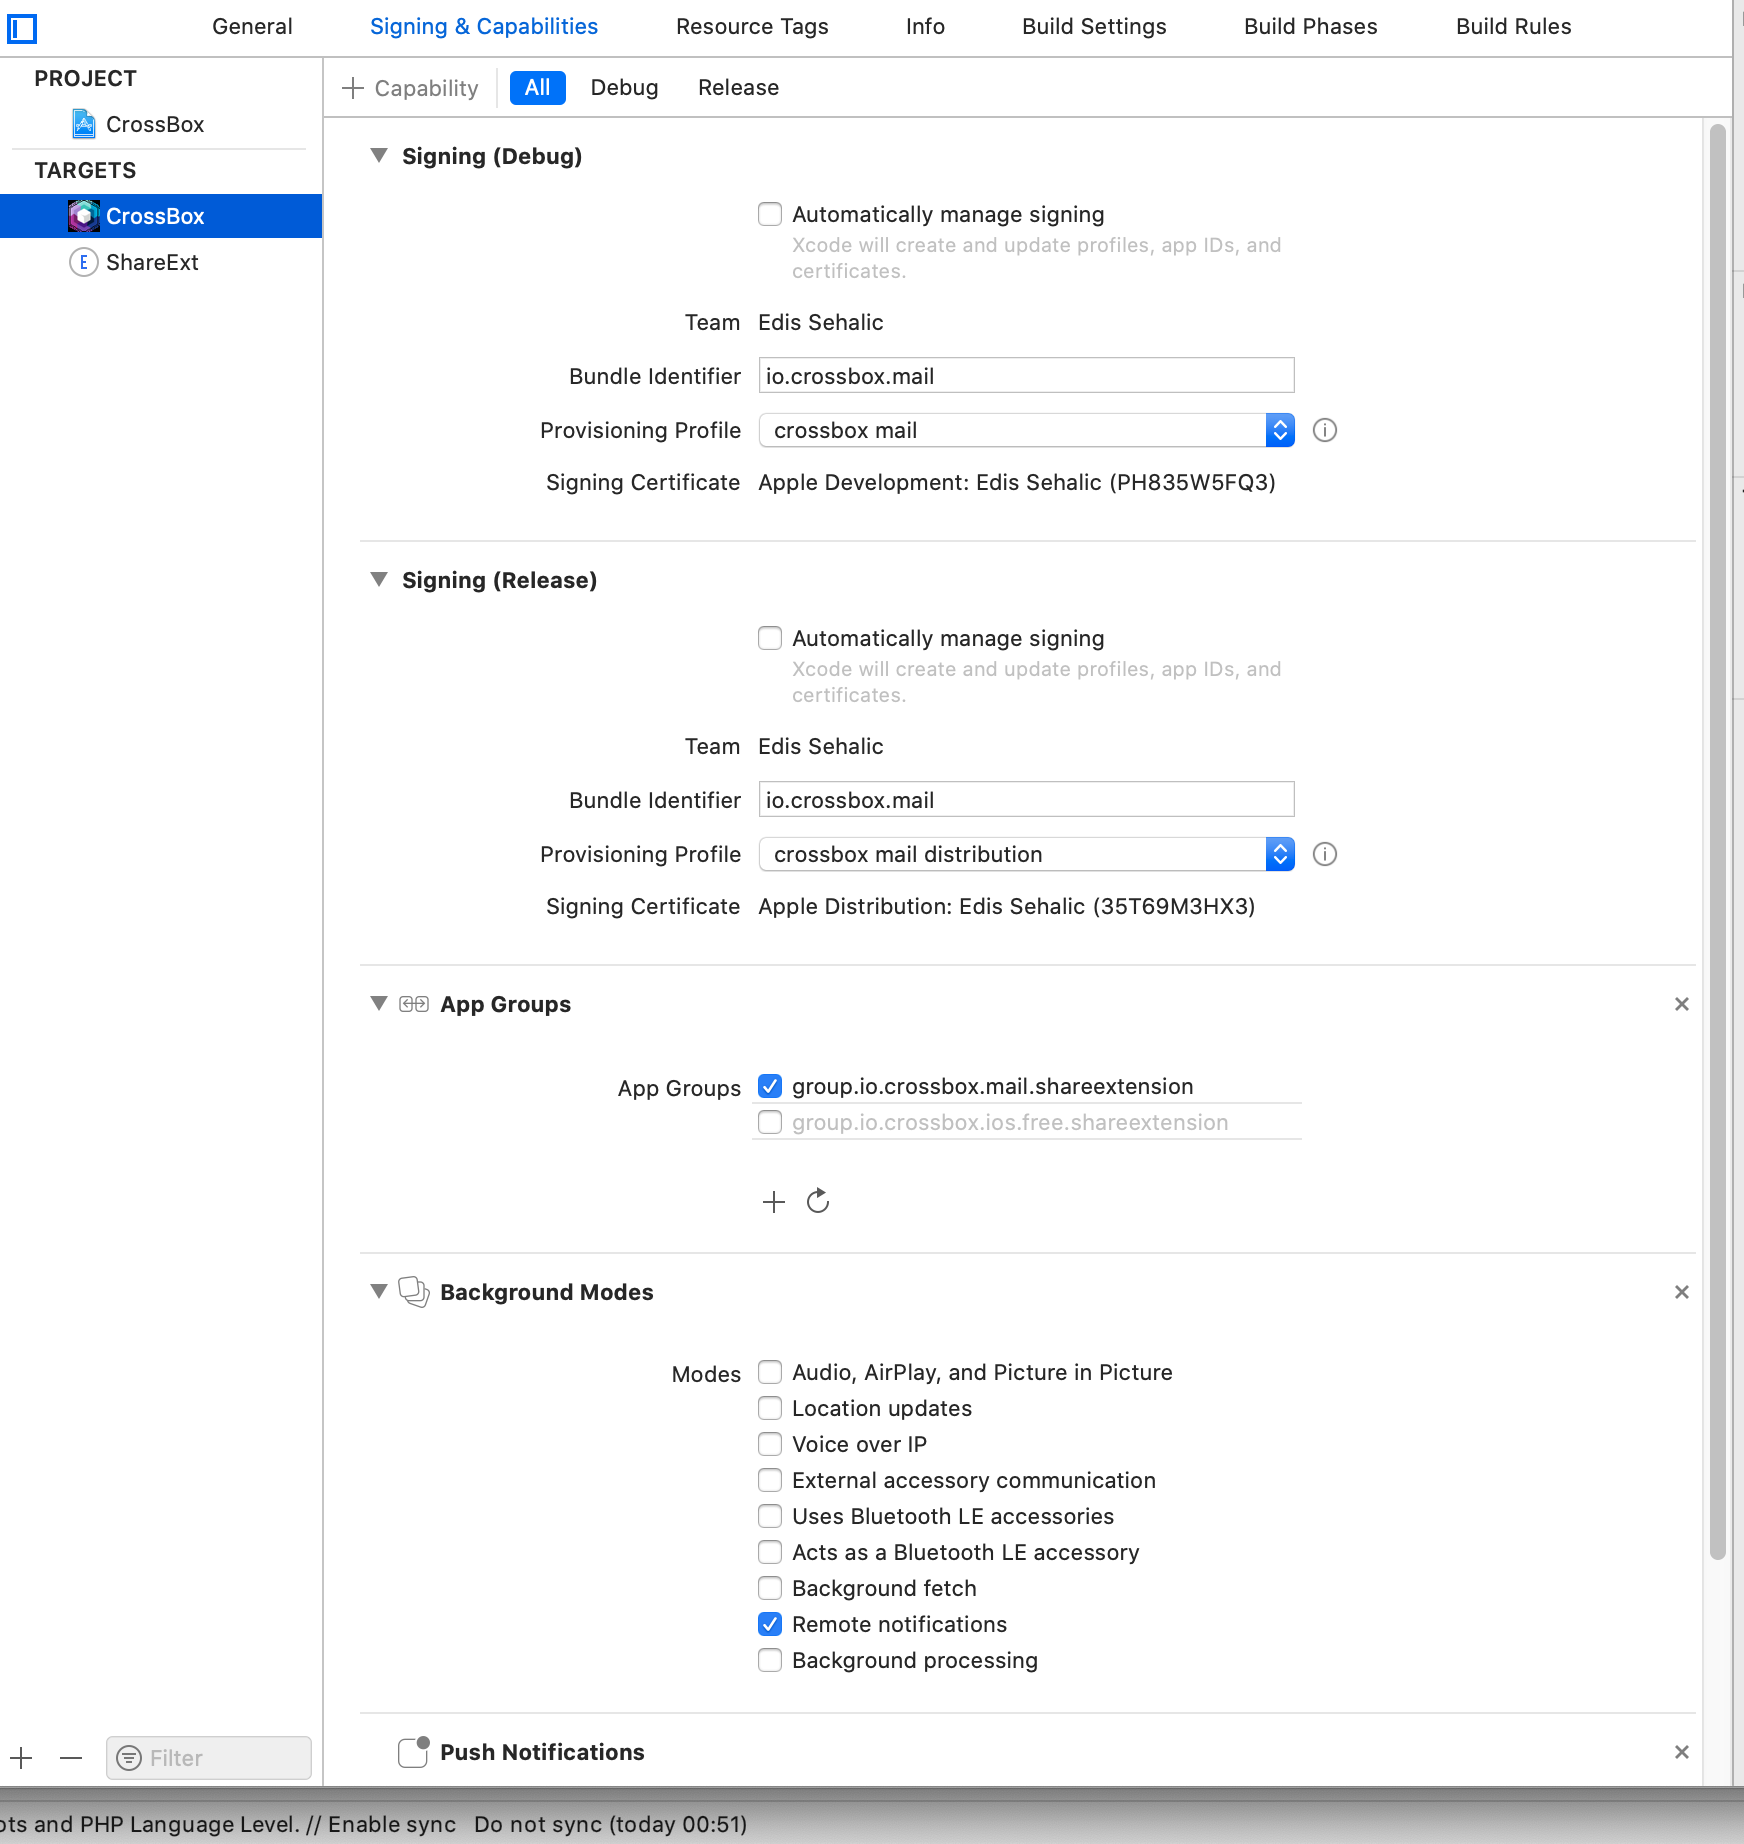
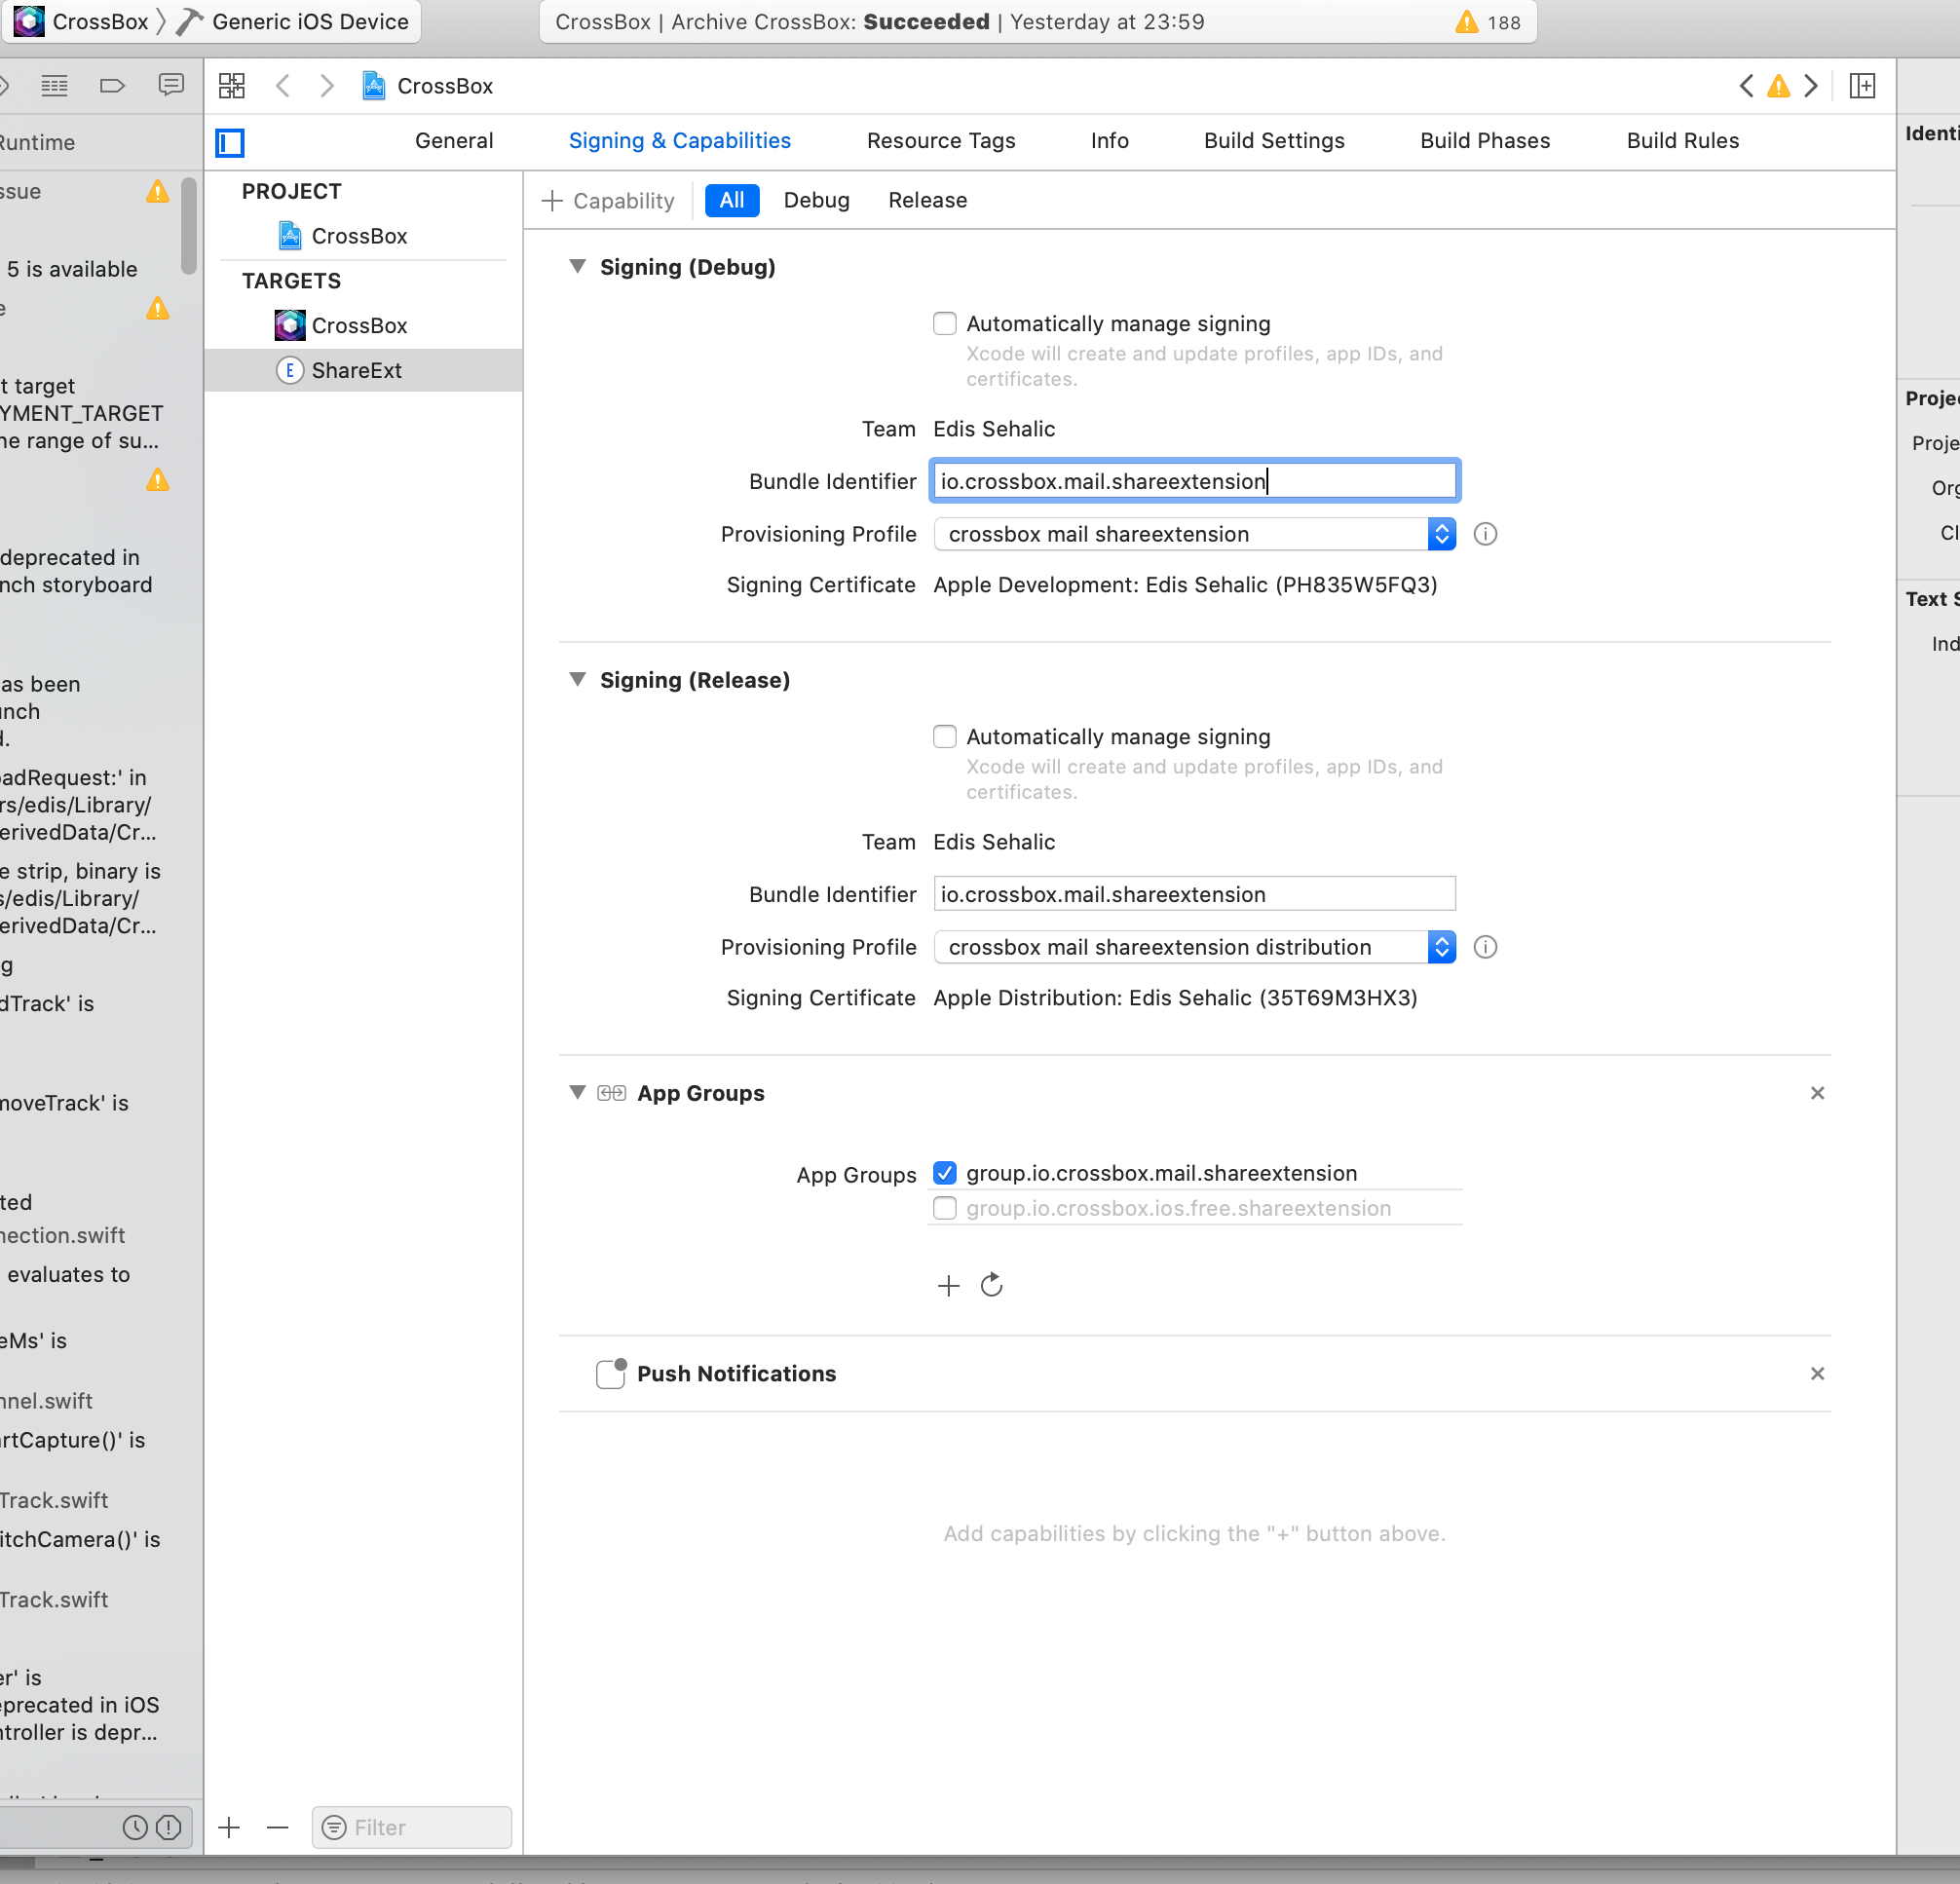
Notice the Signing certificate for Debug and Release: Debug(Apple Development) Release(Apple Distribution)
Both targets must have proper certificates configured
XCode will complain if the certificates are not properly configured. If you need help with that, you can contact us via Tickets or live Chat.
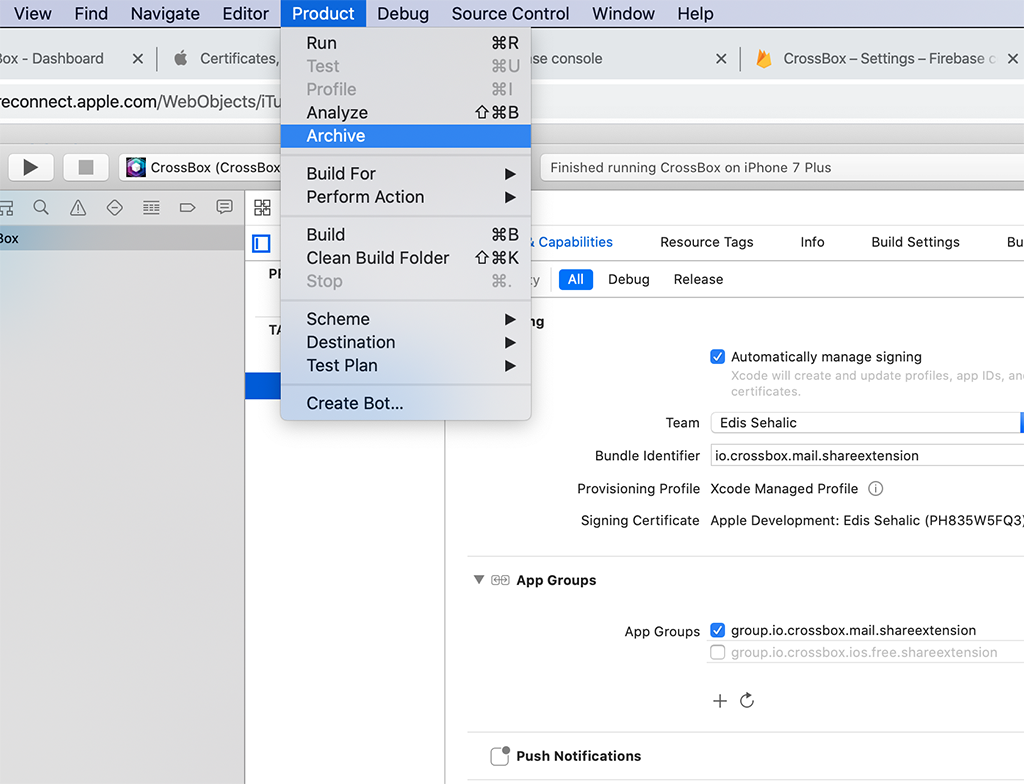
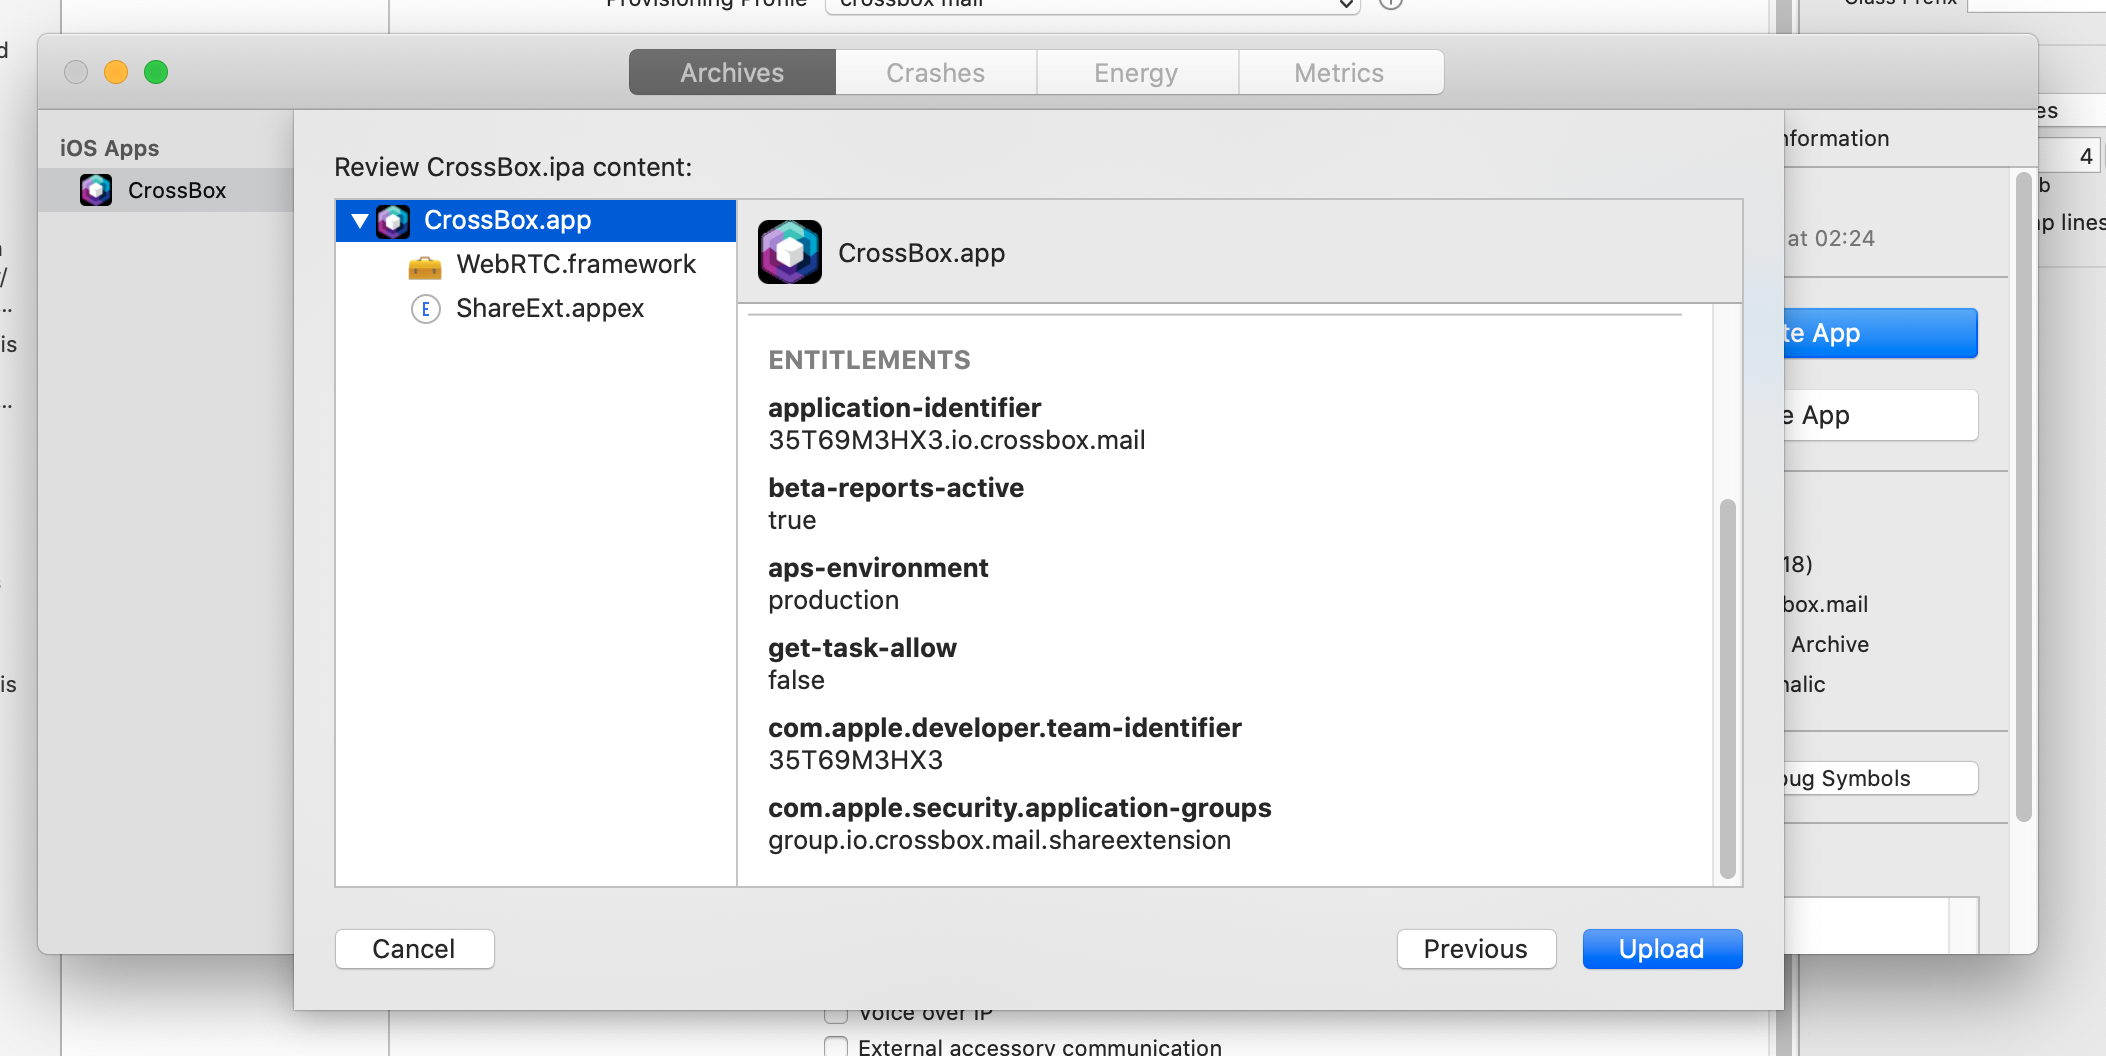
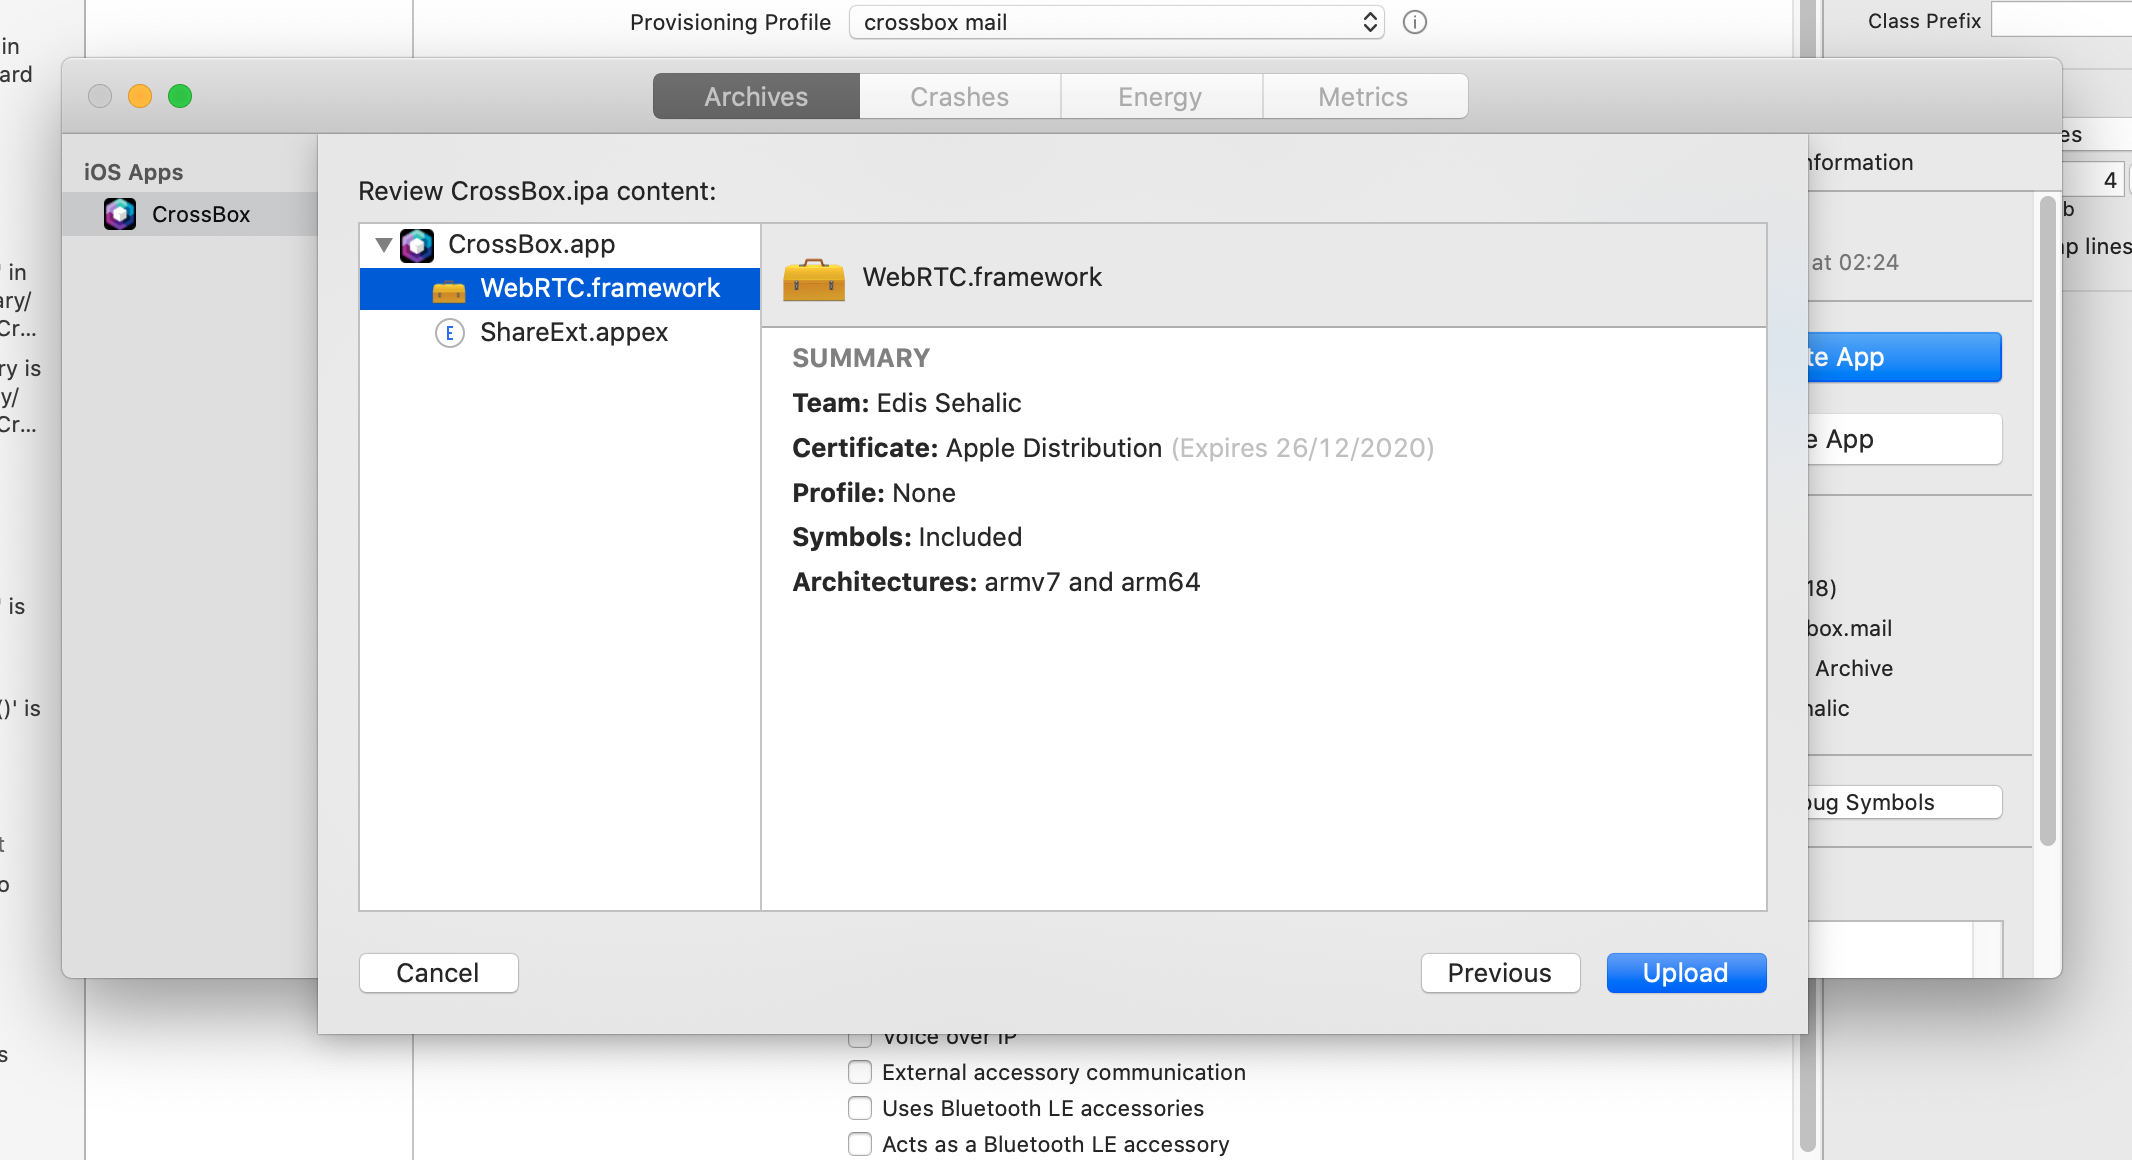
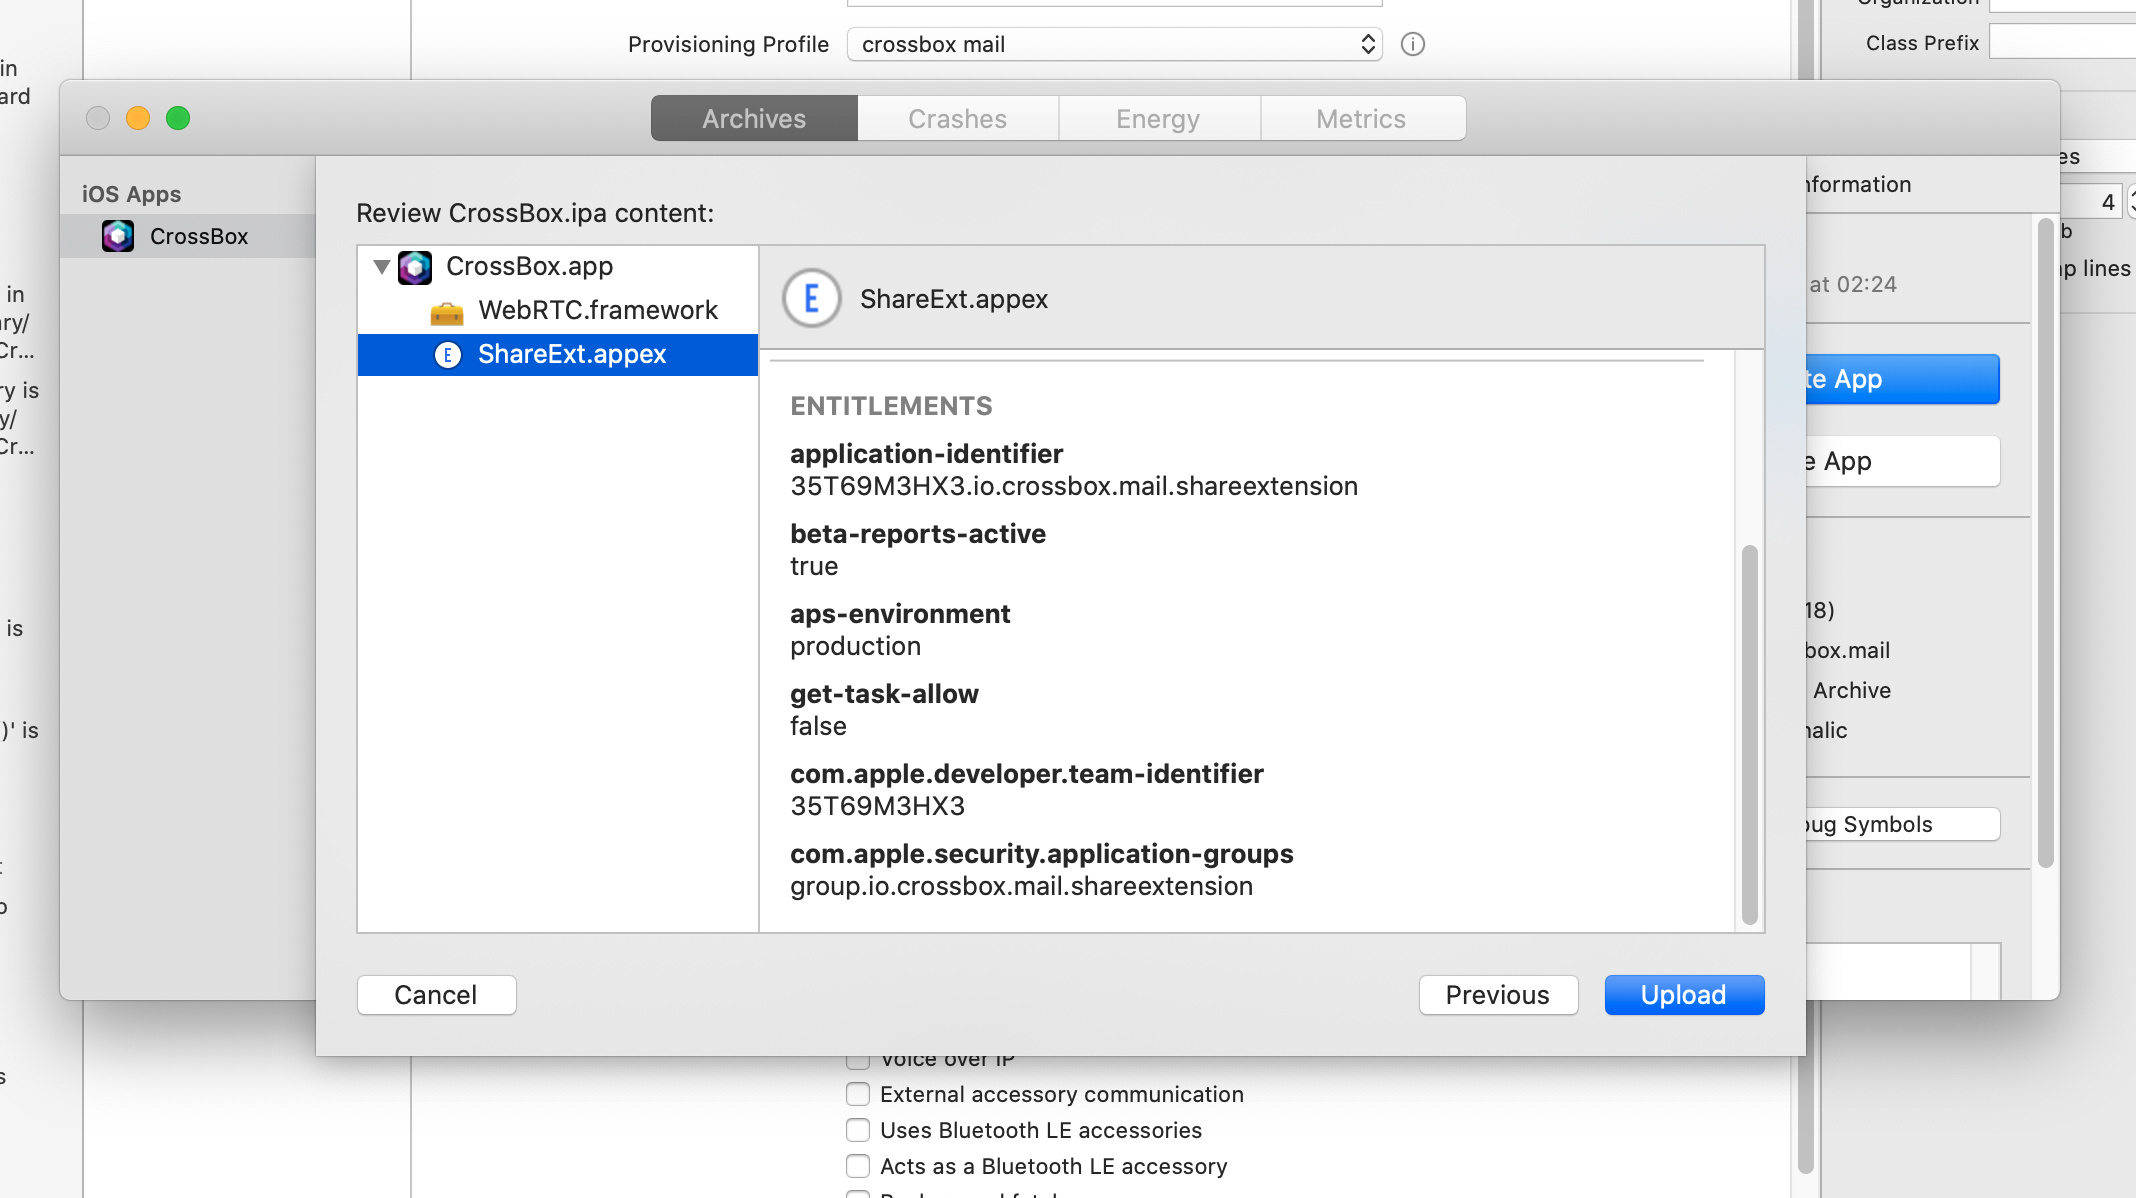
Then go to Product > Archive
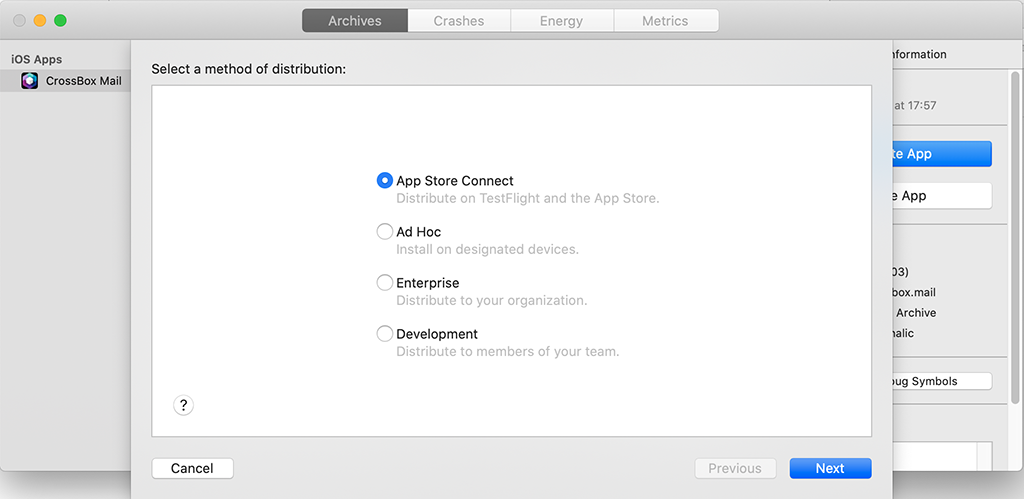
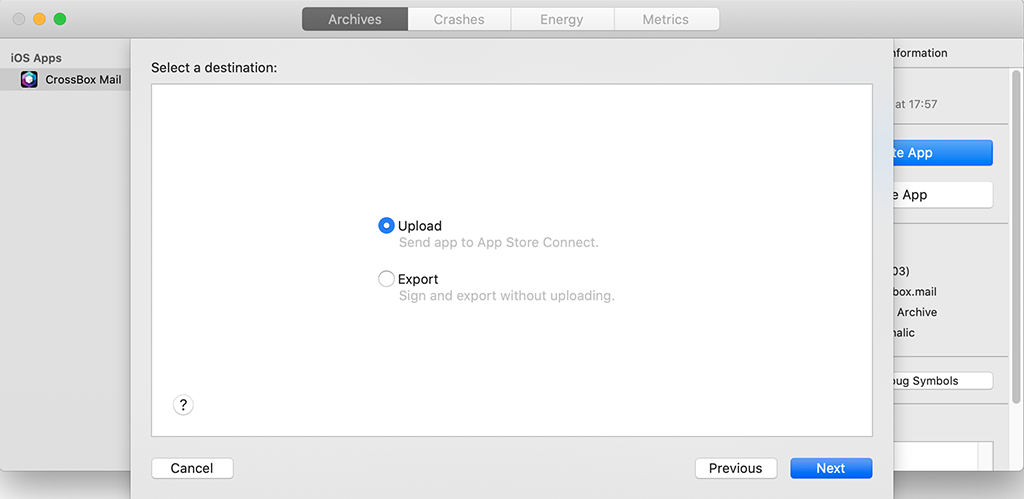
- Click Distribute App
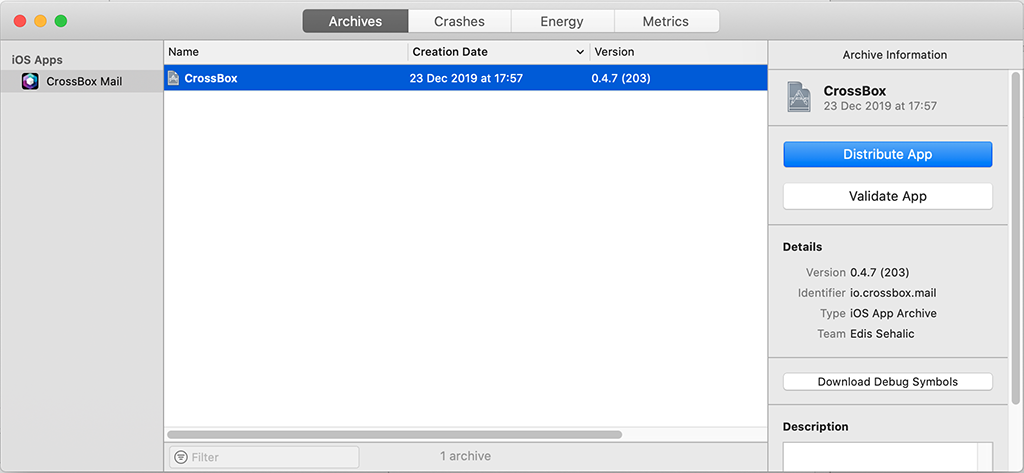
- The app will be validated and uploaded to https://appstoreconnect.apple.com/
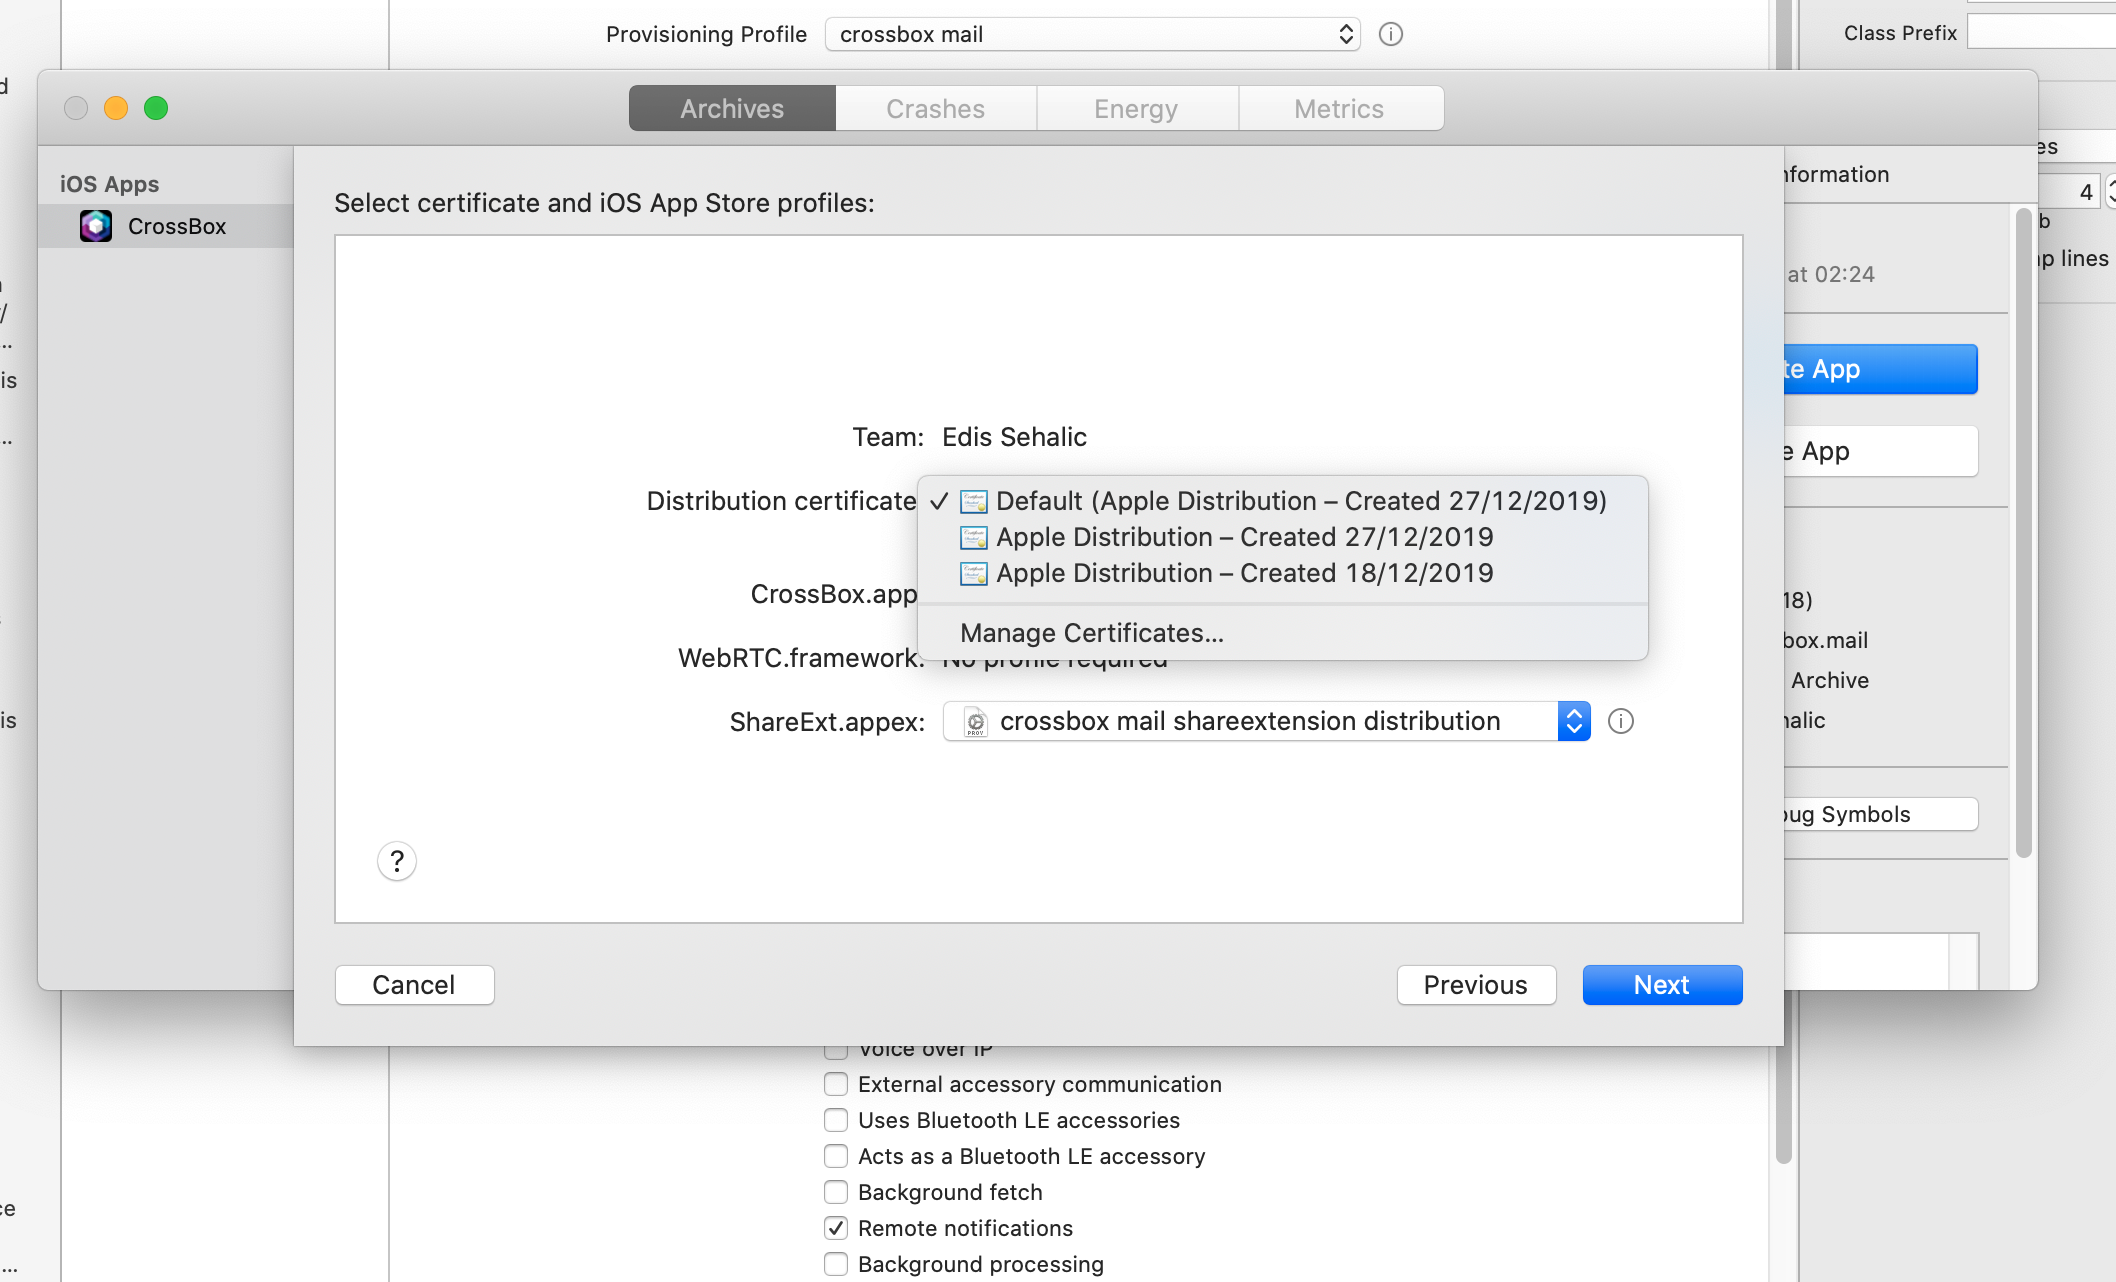
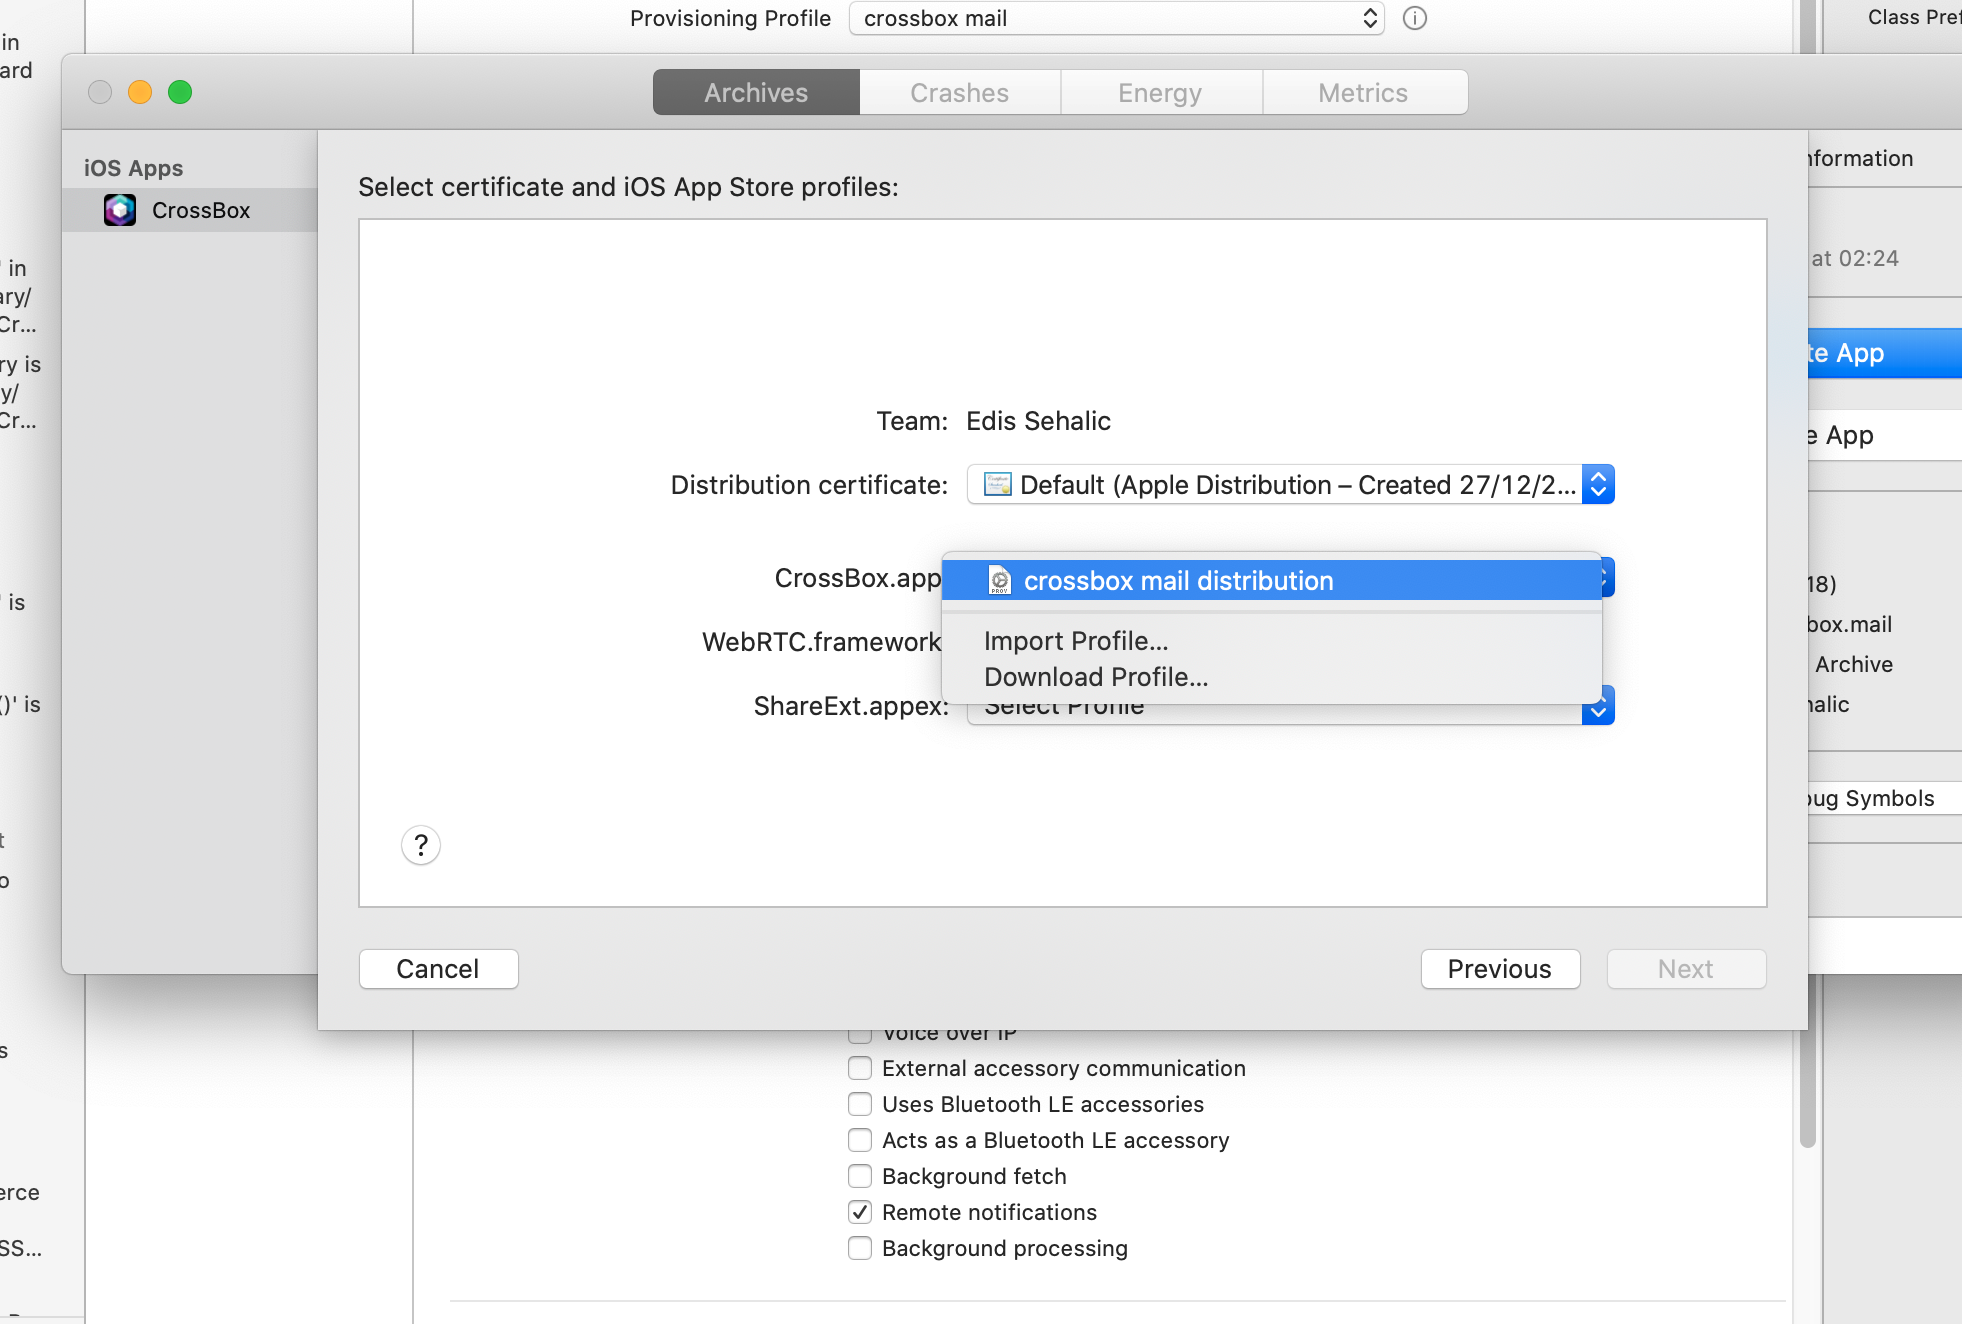
After this step, you will be asked to confirm your certificates again, please select the ones you set up initially:

After this step, you will see the final step
- After the upload, the processing may take up to an hour.
- You will get an e-mail after the build has been processed by Apple.
- After the submitted app has been processed you can start filling up the information and prepare for submission. Apple will require you to provide a test account which they'll use to review the app
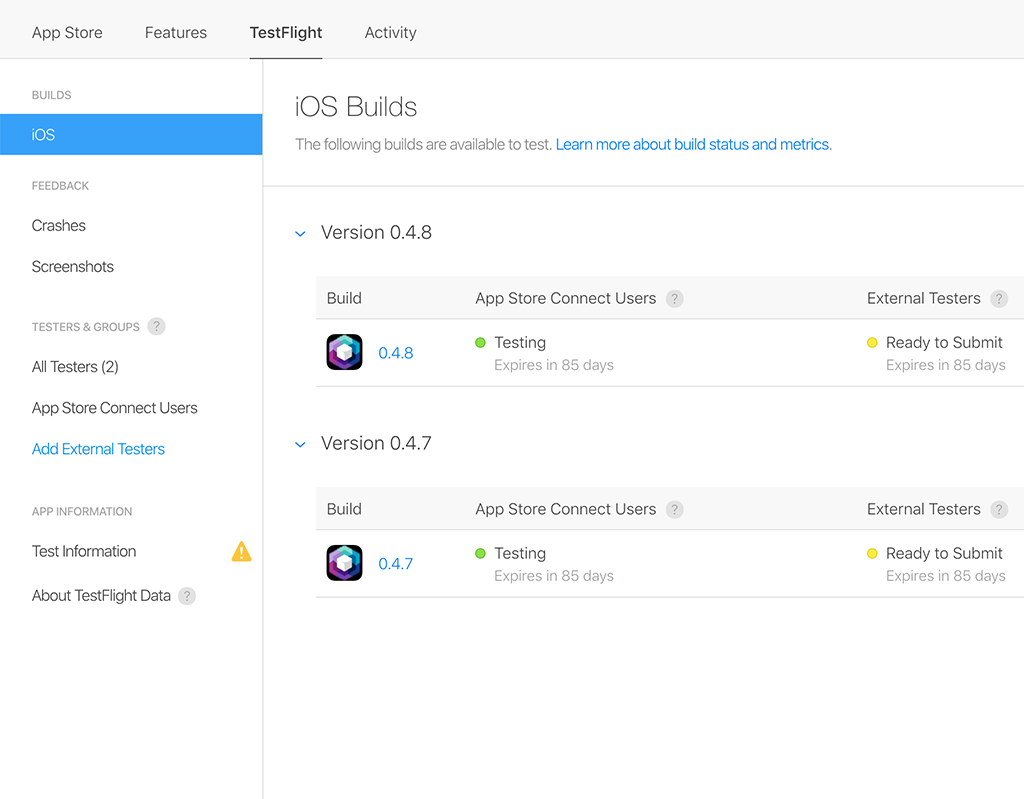
NOTE: There's a known issue with TestFlight that it might say that processing is not complete, in order to fix the problem logout and login again. Sometimes it may take between 30 minutes to a few hours to complete.
- Apple may ask you to answer some questions about the App.
We prepared the answers for you. Replace placeholders APP_NAME, COUNTRY_REGION, SERVICE_PROVIDER_SIGNUP_LINK, and SERVICE_PROVIDER_WEBSITE with your own.
1. What is the purpose of the app?
APP_NAME is the All-in-one Communication Suite designed for Small and Medium Enterprises in COUNTRY_REGION(optional) for their modern-day communication needs.
2. Who is your target audience?
Small and Medium Enterprises and individuals
3. Is this app built for a specific company and its internal use? If yes, which company?
No
4. Or is the app built for internal use for your company?
No
5. How do users obtain an account?
By signing up to SERVICE_PROVIDER_SIGNUP_LINK and purchasing the hosting service for their domain. After signup, they can create an account via admin interface.
6. If users create an account to use your app, are there fees involved?
User pays for the service monthly or yearly via the SERVICE_PROVIDER_WEBSITE
7. Does your app access any paid content or services?
The user only pays for the service monthly or yearly via the SERVICE_PROVIDER_WEBSITE
8. What are the paid content or services, and what are the costs?
Costs are N to N $ as listed on the website SERVICE_PROVIDER_WEBSITE
9. Do individual customers pay for the content or services?
Yes, they can purchase the service via SERVICE_PROVIDER_WEBSITE as there is no requirement to be a business.
10. If no, does a company or organization pay for the content or services?
N/A
Known issues on IOS
If the build process in Xcode fails, you can try to fix it by:
- Installing cocoa pods on your machine - https://cocoapods.org/
- Correcting the build settings for the Swift version - make sure you select Swift Version 4
.png)
If you get any of the following errors:
- Unsupported Architectures. The executable contains unsupported architectures '[x86_64, i386]
- Invalid Segment Alignment. The app binary does not have proper segment alignment
- The binary is invalid. The encryption info in the LC_ENCRYPTION_INFO load command is either missing or invalid, or the binary is already encrypted

These errors happen if you forgot to run sh prepare-production.sh before starting the submission to the Apple Store as explained here.