CrossBox Server
- Requirements
- Quick Installation
- Options in Details
- Admin Area
- Command Line Tools
- Performance Tuning
- Uninstall
- Migration
- Post machine migration
Requirements
Intro
Even though CrossBox is highly portable, make sure that your server satisfies the listed server requirements.
Supported Operating Systems
CrossBox Server runs on any x86-64 (64 bit) Linux based operating system that has glibc version 2.17 and up.
Listed below are minimum required distribution versions. Versions equal to or greater than the ones listed below are fully supported:
- RedHat/CentOS/CloudLinux 7
- Ubuntu - 16.04 LTS xenial
- Debian - 9 stretch
- Fedora - 30
- OpenSUSE - 15.1
- Arch Linux
- Slackware - 14.2
- Gentoo
- Mint - 18.3 sylvia
You can check you glibc version by running
ldd --version
via the command line interface.
Hardware Requirements
CrossBox Server can run on a small virtual machine, a big dedicated server, or anything in between.
CPU and memory requirements vary depending on the version you'll be running, the number of enabled features, and the number of concurrent users.
Standalone Version
The standalone version comes with everything prepackaged and preconfigured. It is intended for installing and running on a fresh, clean server.
Bare-minimum (use only core features):
- 1 CPU
- 512 MB of RAM
- 5GB of Disk Space
Following features require additional memory when enabled:
- Anti-Spam - 250 MB of RAM
- Anti-Virus - 600 MB of RAM
- TURN/STUN - 50 MB of RAM
- Document Converter (CDC) - 100 MB of RAM
- TrustedLink (email assets SSL proxy) - 50 MB of RAM
To run a standalone version with all features enabled, we recommend you install CrossBox on a server with at least 1 CPU and 2GB of RAM.
Control Panel Version
It's common for servers that utilize a control panel to have many of the needed services like MTA, mail server, anti-spam service, and anti-virus already running and in place.
Therefore, when installing on a server that's running cPanel, DirectAdmin, or Plesk, we auto-detect and use the following services automatically:
- MySQL
- Exim
- Dovecot
- MailScanner
- ClamAV
- CSF
- Firewalld
- UFW
- Solr
This effectively reduces the total memory needed for CrossBox to run to just 512 MB of RAM, when used alongside the control panel.
Supported Control Panels
cPanel, Plesk, and DirectAdmin currently have deep-integrations available.
However, you can still use CrossBox with any control panel due to its plug and play nature, but unlike with the supported control panels, some functions are not automated and may require manual action.
Hardware Calculation
If you want to calculate your CPU and RAM resources in advance, here are the numbers:
1CPU, 2GB RAM for 100 concurrent users.
For example, if your plan is to host 100 concurrent users, you'll need:
- 1 CPU
- 2GB RAM
If your plan is to host 200 concurrent users:
- 2+ CPU
- 4GB+ RAM
Software Dependencies
You don't need to install any new software dependencies for CrossBox to work. It comes pre-compiled and runs isolated from the rest of the system.
It won't ask you to install anything via your system's package manager other than core packages like locale package etc. We do not interfere with other software/packages/libraries you may already have running on the server.
Firewall
Most of the time firewall will be configured with what's installed on the machine. However, this may not be the case with custom firewall configurations. We only support CSF, UWF, Firewalld. If CrossBox is not accessible, but crossbox status says all services are running, the most common reason for limited connectivity is your firewall.
When installing panel version of CrossBox, these ports must be free:
100 - TCP IN/OUT CrossBox default port
80 - TCP IN/OUT
443 - TCP IN/OUT
3478 - TCP and UDP IN/OUT TURN
5349 - TCP and UDP IN/OUT TURN Secure
49152:65535 - UDP IN/OUT Port range for TURN
When installing standalone version of CrossBox, these ports must be free:
25 - TCP IN/OUT SMTP Local Delivery
80 - TCP IN/OUT CrossBox HTTP
100 - TCP IN/OUT CrossBox default port
110 - TCP IN/OUT POP3
143 - TCP IN/OUT IMAP
443 - TCP IN/OUT CrossBox HTTPS
465 - TCP IN/OUT SMTP Secure
587 - TCP IN/OUT SMTP
993 - TCP IN/OUT IMAP Secure
995 - TCP IN/OUT POP3 Secure
3478 - TCP and UDP IN/OUT TURN
5349 - TCP and UDP IN/OUT TURN Secure
49152:65535 - UDP IN/OUT Port range for TURN
If any of these ports are taken, the installer will likely fail. Make sure you disable/remove all services that bind to these ports.
Or if otherwise configured, as CrossBox allows custom ports in the configuration settings.
Master and Slave servers
Entire cluster must be able to communicate with each other trough 80/443 and default 100 port (unless configured differently). If Master server cannot connect to slave servers, login and other services will not work.
Other Requirements
Hostname
Make sure that before installing CrossBox your server has a resolvable hostname.
PTR (Reverse DNS)
We recommend that the server has a valid PTR (Reverse DNS) record that matches the server's hostname. A valid PTR record is important for good e-mail delivery.
Most VPS/Dedicated server providers allow you to edit a PTR record via the control panel they provide.
Root Access
A root user account and SSH access are required to install a CrossBox Server.
Web Terminal with root user access can also be used (for example WHM Terminal).
Home Directory
Your system needs to have a /home directory. If it doesn't exist, CrossBox Installer will automatically create it.
Let's start
Are you ready to get started?
Continue to Quick Installation Guide and have CrossBox up and running in a couple of minutes.
Quick Installation
Intro
First, please make sure that you checked out the Requirements before you start with the installation.
To install CrossBox you need to have a valid and active license. If you don't have one, you can purchase it here.
Here we will show you how to install CrossBox on a single server. If you plan to install CrossBox on multiple servers, please head out to our CrossBox Cluster documentation to learn how you can unify communication across different servers and configurations.
Installation
Run the Command
SSH into your server and run the following command as root:
sh <(curl https://cdn.crossbox.io/install.sh || wget -O - https://cdn.crossbox.io/install.sh)
Then proceed to log in with your CrossBox.io account:

After a successful login, you'll find the URL that you can now use to start the installation via your web browser.
The URL will be similar to the one shown below, but unique to your installation instance:

Access the Installation via the Web Browser
Open your favorite web browser and paste the URL that you copied.
Configure
Almost everything is already pre-populated for you and the entire process takes about ten minutes or often less, depending on your server's performance.
.png)
Detailed Help
If you're not sure what to enter in a certain field during the installation, just click on the "Learn more" link which is displayed beneath it:
.png)
By clicking it, you'll be taken directly to that option's more detailed documentation.
Start the Installation
After you click the "Install" button, CrossBox will start setting everything up. You can track the progress in real-time as shown below:
.png)
Finish the Installation
.png)
Options in Details
Server
Tweaking CrossBox Server to fit your needs is as easy as enabling and disabling features with a simple checkbox click. CrossBox will auto-detect if some kind of a control panel is already installed on the server and will auto-adjust itself. Here we have listed all the options and associated help descriptions.
Hostname
CrossBox will try to automatically resolve a hostname of the server it's being installed onto.
However, make sure that before installing CrossBox you have a valid PTR (Reverse DNS) record that matches your hostname and that your hostname can be successfully resolved.
Public IP Address
CrossBox will try to automatically resolve an IP address of the server it's being installed onto.
App Port
Enter a Port number that CrossBox will bind to and listen on.
If you're installing master server this option is disabled and ports 80/443 are enforced. Otherwise, you can specify a custom port.
Please make sure that App port(s) are not used by some other software running on the server.
If you have a firewall in place, please make sure that binding to these ports is allowed.
App Port cannot be changed after the installation.
SSL
We strongly recommend that you enable the SSL feature. Not only it will help protect data being sent over the network from prying eyes, but it is also needed for audio and video calls to work. It is very easy to set up and you have four options to choose from:
- Generate SSL certificates automatically (by using Let's Encrypt Certbot)
- Select from an auto-detected list (will scan the system for existing certificates) - this is visible if the installer detects SSL certificates
- Enter .crt/pem .key paths (lets you enter paths to certificate files)
- Upload .crt/pem and .key files (lets you upload certificate files)
TURN/STUN Server
CrossBox uses Coturn as a fast and reliable TURN/STUN server. It is responsible for streaming audio and video data during the CrossBox audio/video conference and for relaying media traffic when persons attending the call can't reach each other directly via the peer-to-peer protocol. This is most often the case when the person is behind a corporate firewall.
Overall, enabling a TURN/STUN server will greatly improve the quality of audio and video calls. The CrossBox Installer will give you the ability to choose if you wish to enable TURN/STUN integration and will also allow you to decide where it should be hosted.
You can choose to install it on the same server as CrossBox or you can enter an external server to offload audio and video streaming to a separate machine in the case you have thousands of concurrent calls being made.
If you plan on having more than 50 people streaming audio and video at the same time, please make sure that you allocate enough CPU/Network resources for your TURN/STUN server. The other approach would be to offload media streaming to a Coturn server hosted on another machine, by choosing "Use external coturn server" and filling in Host and SSL Host fields.
Coturn Non-SSL Port
Enter a non-SSL port that Coturn will use. The default Coturn non-SSL port is 3478.
Coturn UDP Port Range
You may leave the default value. If not, please enter a port range in format 12345:13456. The default value is 49152:65535.
Updates
CrossBox has a built-in update system that keeps your installation up to date and automatically updates CrossBox when new updates are available.
At what hour to perform an update
Enter an hour when you wish to check for updates. Uses a 24h format and accepts a number between 0 and 23. 0 means 00:00.
Application Limits
Max Number of Workers
Max number of CPU cores that the application will utilize. Depending on the application traffic/usage you can specify a maximum number of workers based on the number of cores your server has.
Each worker takes about 70-100 MB of RAM.
Max Request Size
In megabytes, enter maximum request body size that the end user can send. For example, users won't be able to upload a file larger than what's defined here. The default value is 1024MB.
Chat Channel Max Participant Count
The maximum number of participants allowed in a chat channel. Increase this if you plan on having more than 50 persons attending. This is a per one channel (room) limitation.
CrossBox Admin
Admin E-mail Address
Admin e-mail address. You may use any email address you want.
Admin Password
This password should be very complex.
Localization
Default Language
Choose the default language for the App. If you want to add your own language, you can do so by translating a language file and sending it back to us. We will then ship it with the next update.
Logging
Error Reporting
In case of an error, the server will securely send us the traceback and the message - so our team can detect and fix the issue ASAP, with an aim of minimizing the bug's impact on larger audiences.
MySQL
Use CrossBox MySQL database
Enable if you don't have a MySQL server already running on the server.
If you enable this feature, CrossBox will use its own MariaDB (MySQL) server for storing users' data. Otherwise, it will try to connect to a MySQL server already running on the system and use that server for storing database data.
You can also uncheck this option to enter MySQL server details manually. This is useful if you're connecting CrossBox to remote MySQL server or a MySQL Cluster.
Root MySQL user is required. The root privileges are required because CrossBox manages the creation of users' databases.
Enable mail server integration
- Use the mail server already running on the machine (for example when installing on a cPanel/Plesk/Direct Admin server)
- Automatically install and set up a CrossBox mail server (when installing a bare metal/standalone version, or a mail server is not found on the server)
In the first case, the installer will try to find locally available IMAP/SMTP servers and use those for everything related to email.
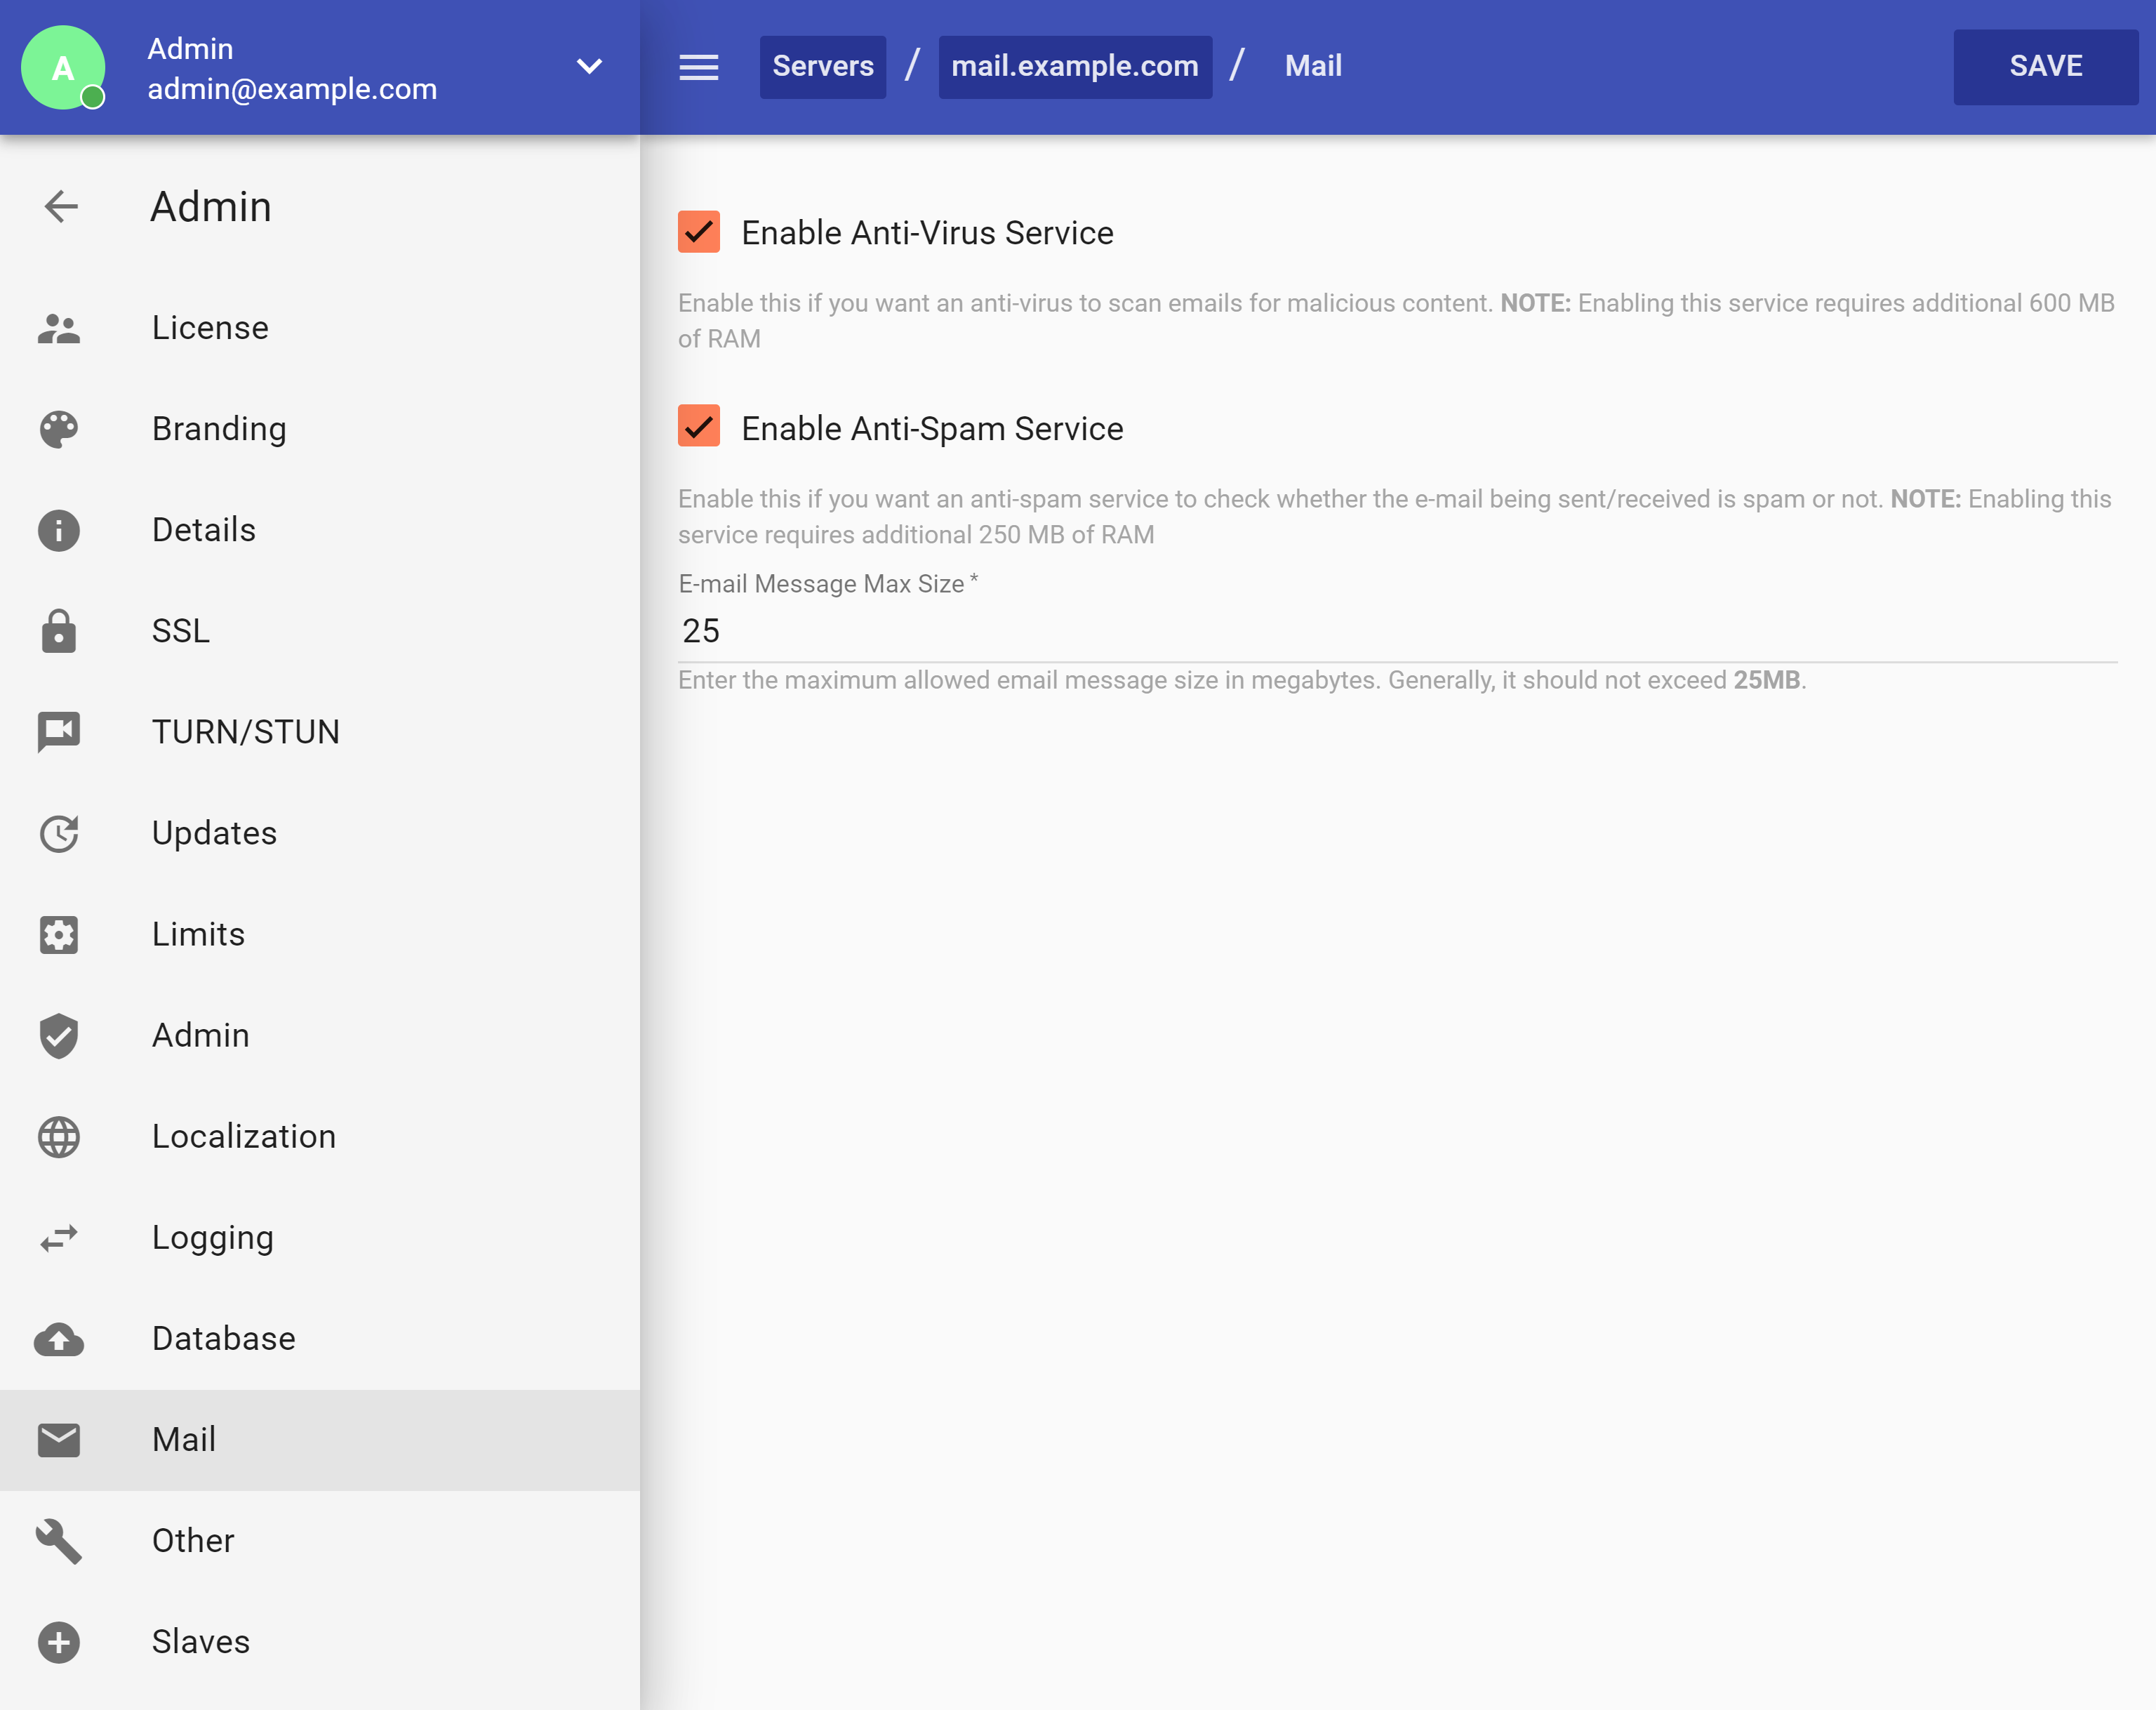
In the second case, you'll be able to enable or disable following mail server features:
Enable Anti-Virus Service
Enable this if you want an anti-virus to scan emails for malicious content. Currently, only ClamAV is supported. If you have ClamAV already running on the server, CrossBox will use that one automatically.
ClamAV requires 600 MB of RAM.
Enable Anti-Spam Service
Enable this if you want an anti-spam service to check whether the e-mail being sent/received is spam or not. Automatic spam/ham learning is also enabled with this service.
Enabling this service requires an additional 250 MB of RAM.
E-mail Message Max Size
Enter the maximum allowed email message size in megabytes. Generally, it should not exceed 50MB.
Automatically create postmaster@ and admin@
This can save you some time by creating often needed email addresses automatically for you.
Other
Google Analytics
To track App usage in real time you need to enter a valid Google Analytics Tracking ID in UA-XXXXX-Y format.
CrossBox Document Converter (CDC)
Service that allows users to view (.docx, .doc, .xls, .ppt + many others) without having to download the files on their device. Users can also download PDF versions of various formats that are supported. This service requires at least 100MB of RAM
Branding
Branding is a great way to white label CrossBox as your own product or service. You can give it a custom name, upload your own logo and change the color scheme to best match your brand. Also, branding addon allows you to have a fully branded CrossBox Client Apps (Web, Desktop, Android & iOS).
Branding feature is most useful for service and hosting providers.
App Name
Enter a custom name for the application.
App Description
Enter a custom Application slogan or a motto. This is usually shown beneath the App Name.
App Product URL
URL of the web page advertising the application. Users are taken to this URL when they want to find out more about the App.
Theme
Lets you brand the App with your own color scheme. Apart from that, you can also upload your own App logo. Image for the logo should be in a PNG format with 1024x1024 px dimensions. CrossBox will then use that image to create logo versions of different dimensions used throughout the application.
iOS and Android App Settings
iOS and Android sections let you define App manifests that Apple and Google stores require when publishing the Apps. You will need to fill in a couple of details:
- App Identifier (This is the Application ID. For example, com.example.appname)
- App Author (The name of the Author)
- App Author E-mail (E-mail address of the author)
- App Support URL (URL where you provide customer support)
- App Store URL (URL for downloading iOS app)
- Play Store URL (URL for downloading Android app)
Push Notifications
This enables push notifications for your branded CrossBox Android and iOS Apps. They keep your end users up to date with new emails, chats, calls, files, and reminders.
GCM is not recommended anymore. Please use FCM - Firebase Cloud Messaging. We strongly recommend that you use FCM for both Android and iOS versions.
When using FCM, you need to obtain FCM Sender ID and FCM Key. Please follow this blog post to find out how to obtain these.
If, however, you must use GCM, then you'll need to fill in GCM Sender ID and GCM Key. To obtain these, please start here.
We do not recommend using APNs, use FCM instead. If you insist on using APNs, then you'll need to obtain APNs certificate as explained in "Generate an APNs client TLS certificate" and then upload it by using "Upload APNs Certificate" upload box during the installation.
Admin Area
Intro
CrossBox features a simple to use administration interface which is used for managing a CrossBox server.
Accessing Admin Area
To access the administration, visit your CrossBox URL and log in by using your admin credentials.
Restoring access to Admin Area
If you lost or forgot your admin credentials, these are the CLI commands that you can run via SSH (as root) to restore them:
$: crossbox info - get general information about the CrossBox installation
$: crossbox admin password - change admin password
$: crossbox admin email - change admin email address
Adding a Domain (Standalone only)
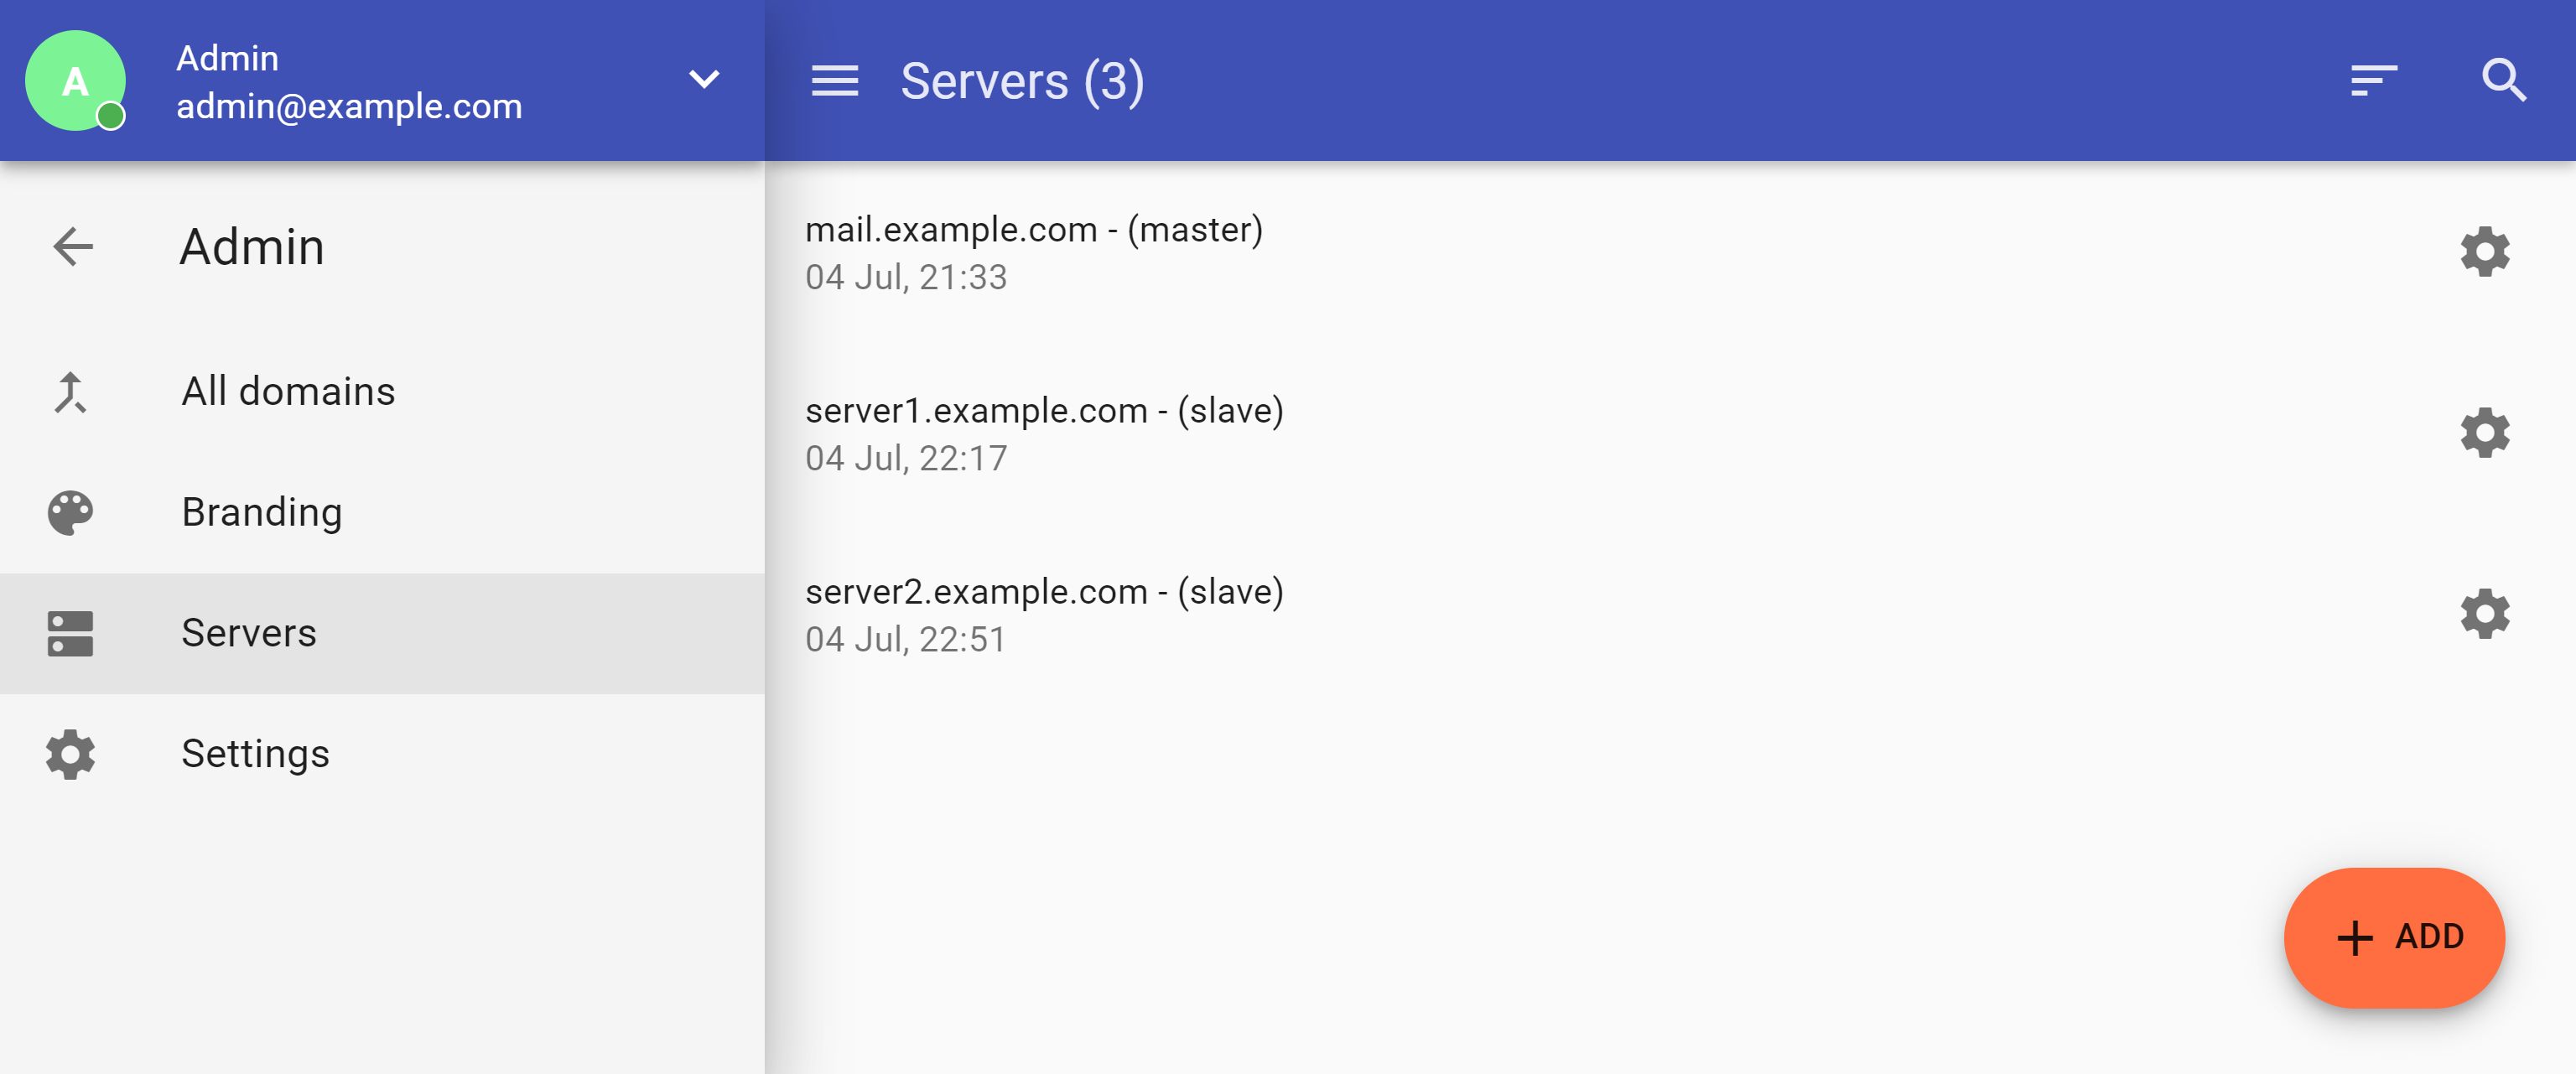
- Go to Admin -> Servers
- Pick a server where you want the domain to reside
- Go to Domains -> Click on the FAB button in the bottom-right corner
- Fill in the form:
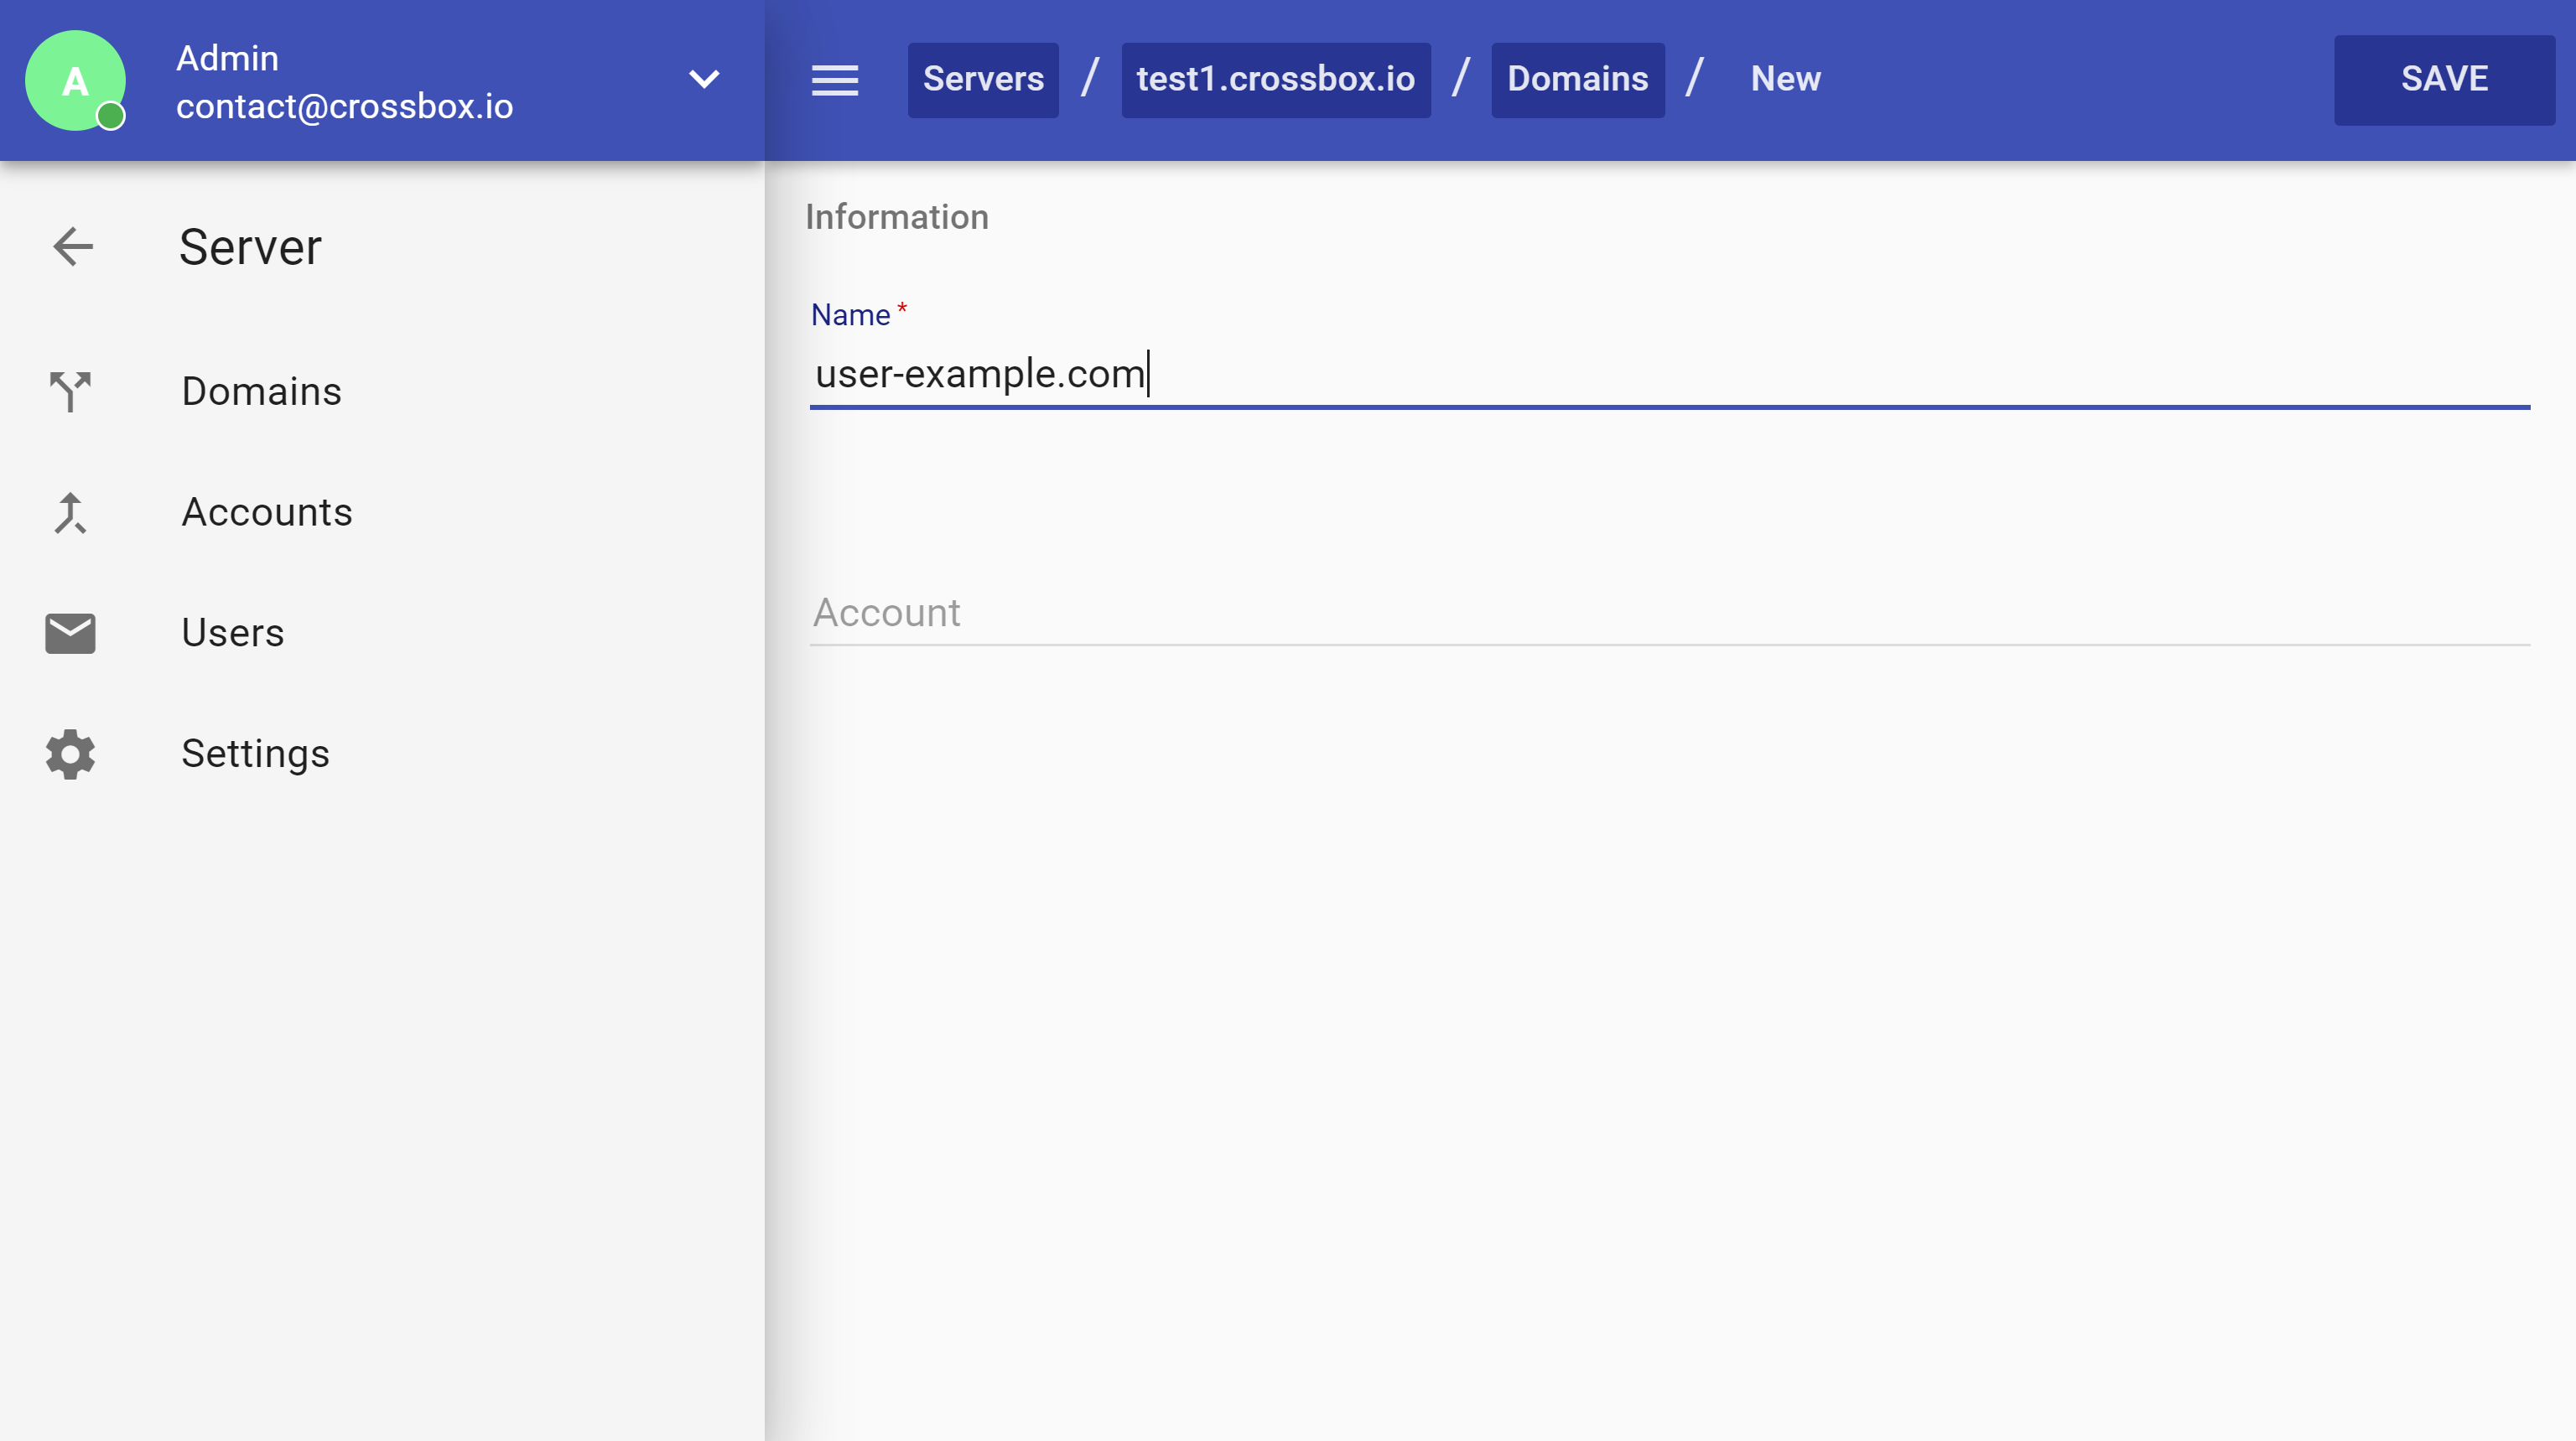
- A name is the domain's name.
- An account is a Linux user that you wish to associate with the domain. If you don't have one, please add a Linux user first by going to the "Accounts" in the side nav.
- Make sure that the domain's DNS zone has an MX record pointing to the CrossBox server.
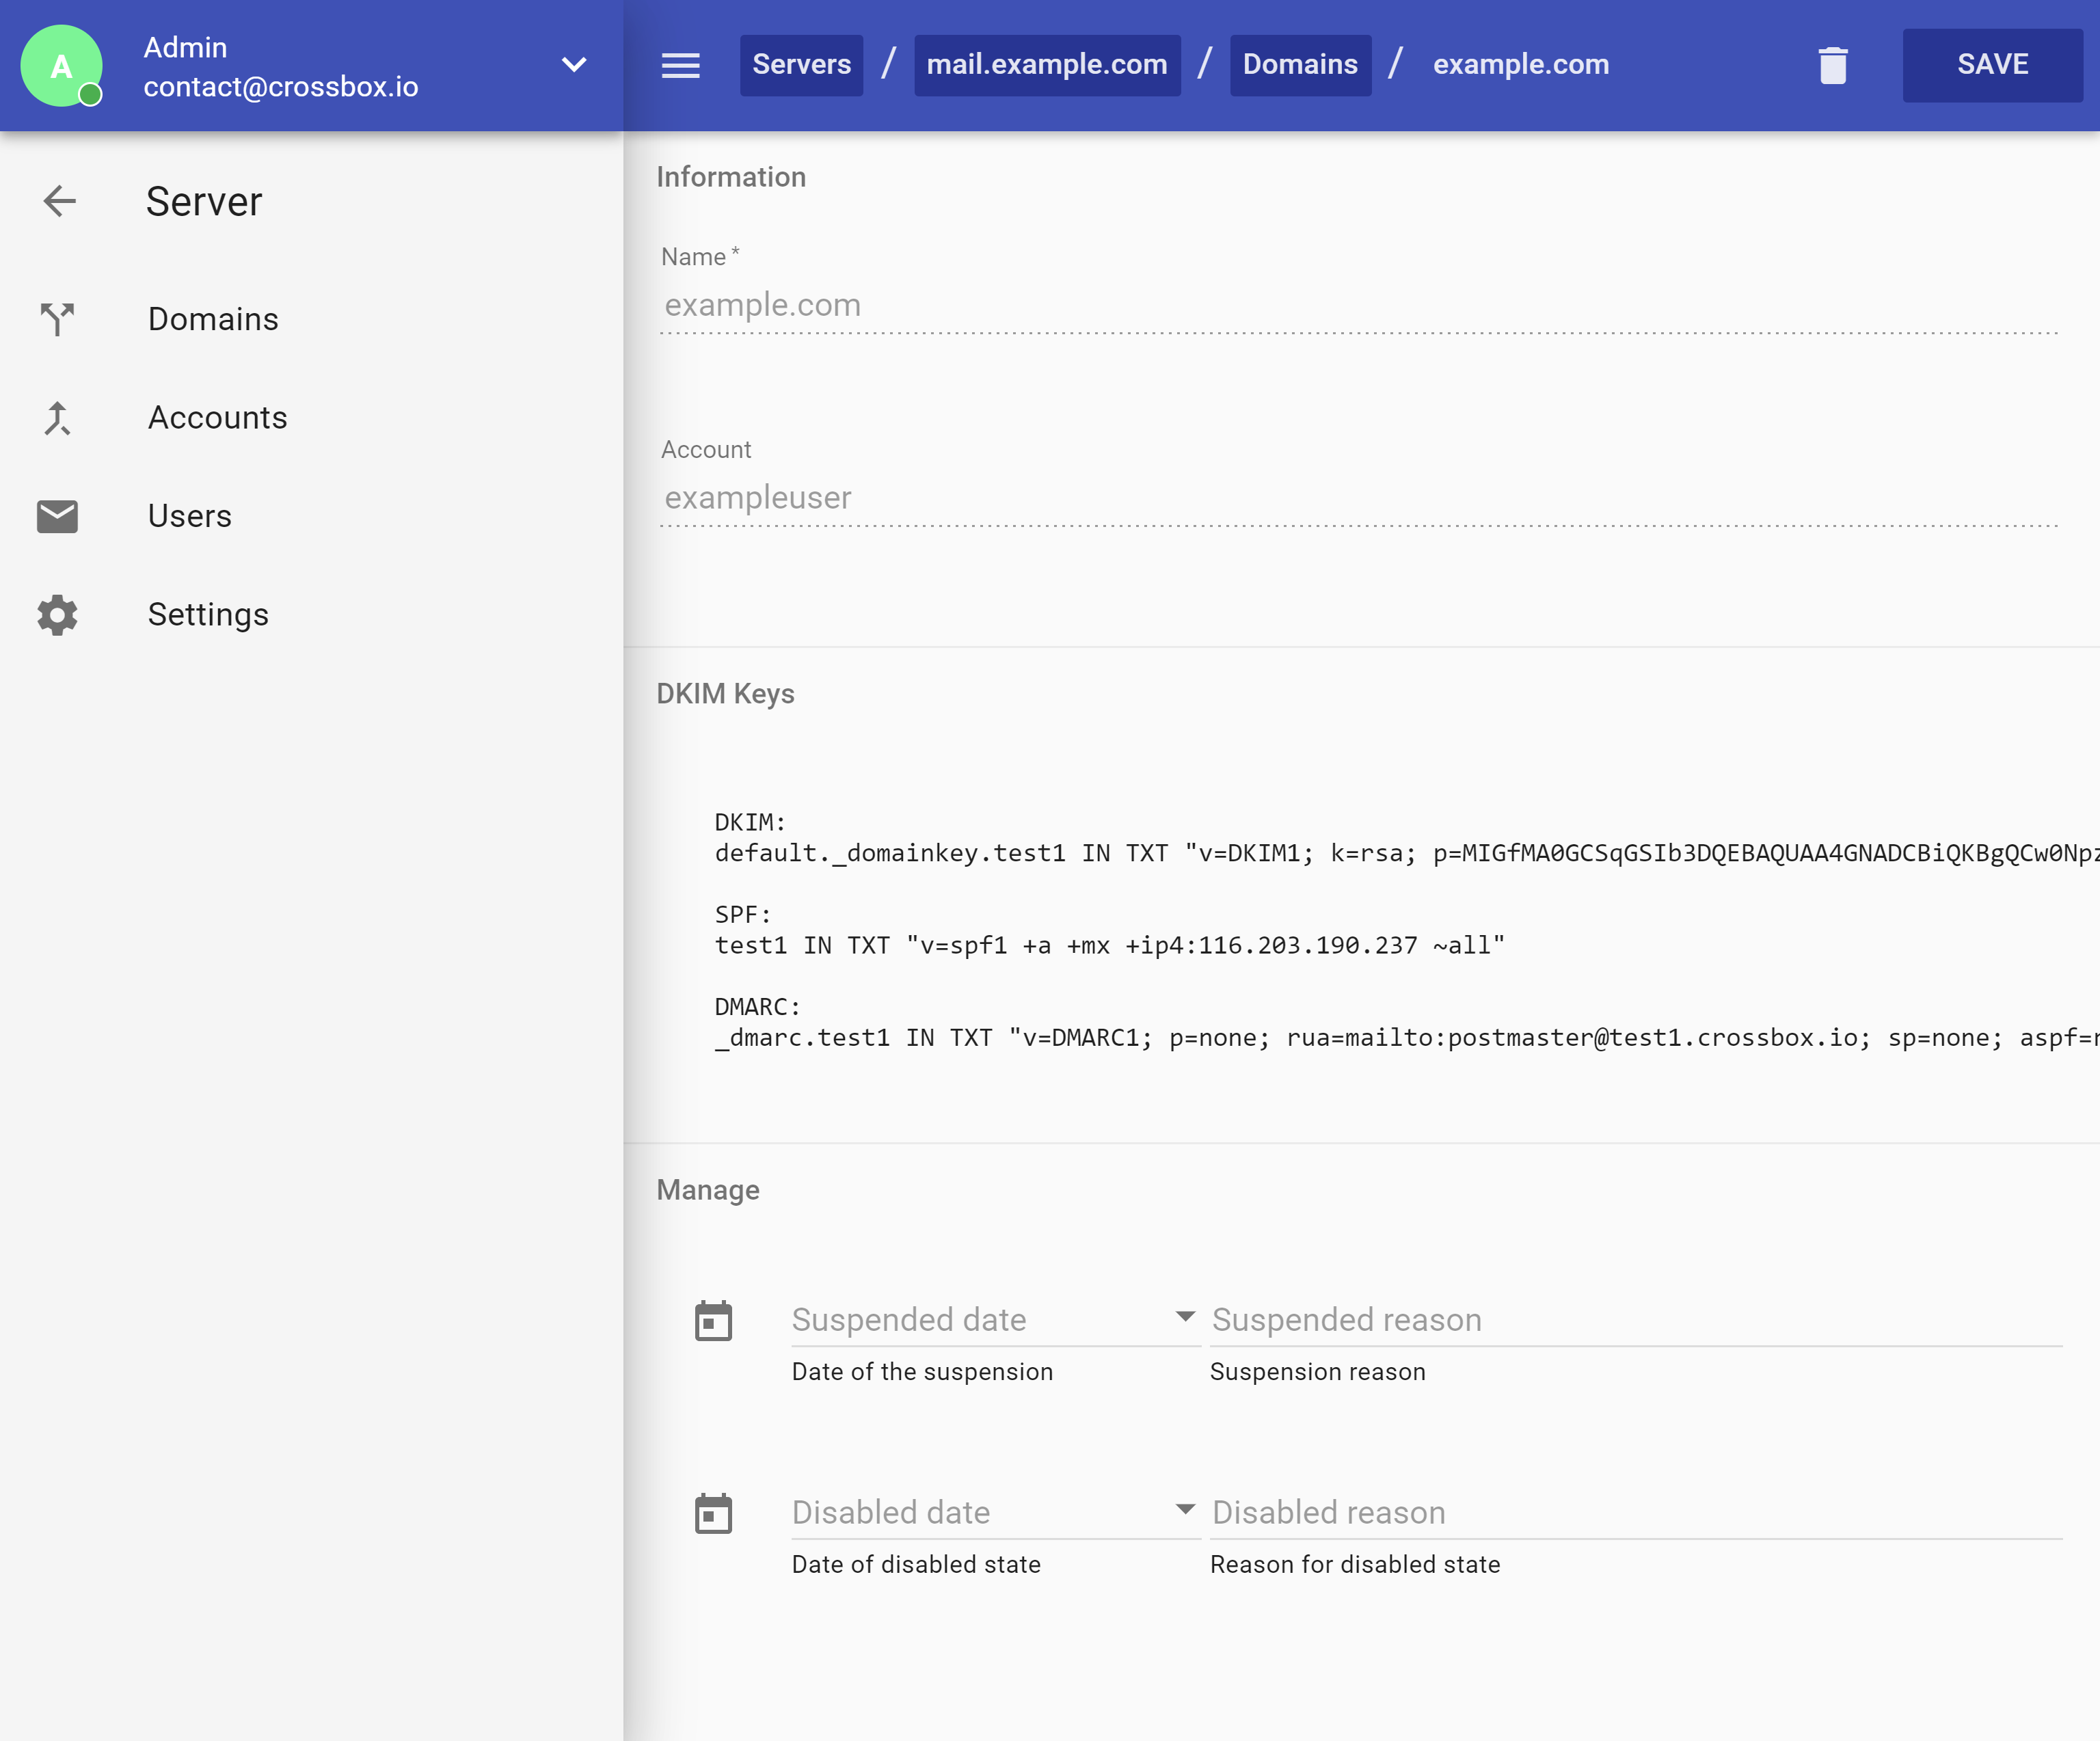
After you click Save, the domain will be created and you can proceed to add e-mail addresses by creating your first CrossBox user.
When submitted, the form will also output DNS records for DKIM, SPF, and DMARC. Make sure you add these to your domain's DNS zone so the outgoing emails can be correctly signed, which maximizes the deliverability:
Adding a CrossBox Account and Email Address (Standalone only)
- Go to Admin -> Servers
- Pick a server where the domain resides
- Go to Users -> Click on the FAB button in the bottom-right corner
- Fill in the form:
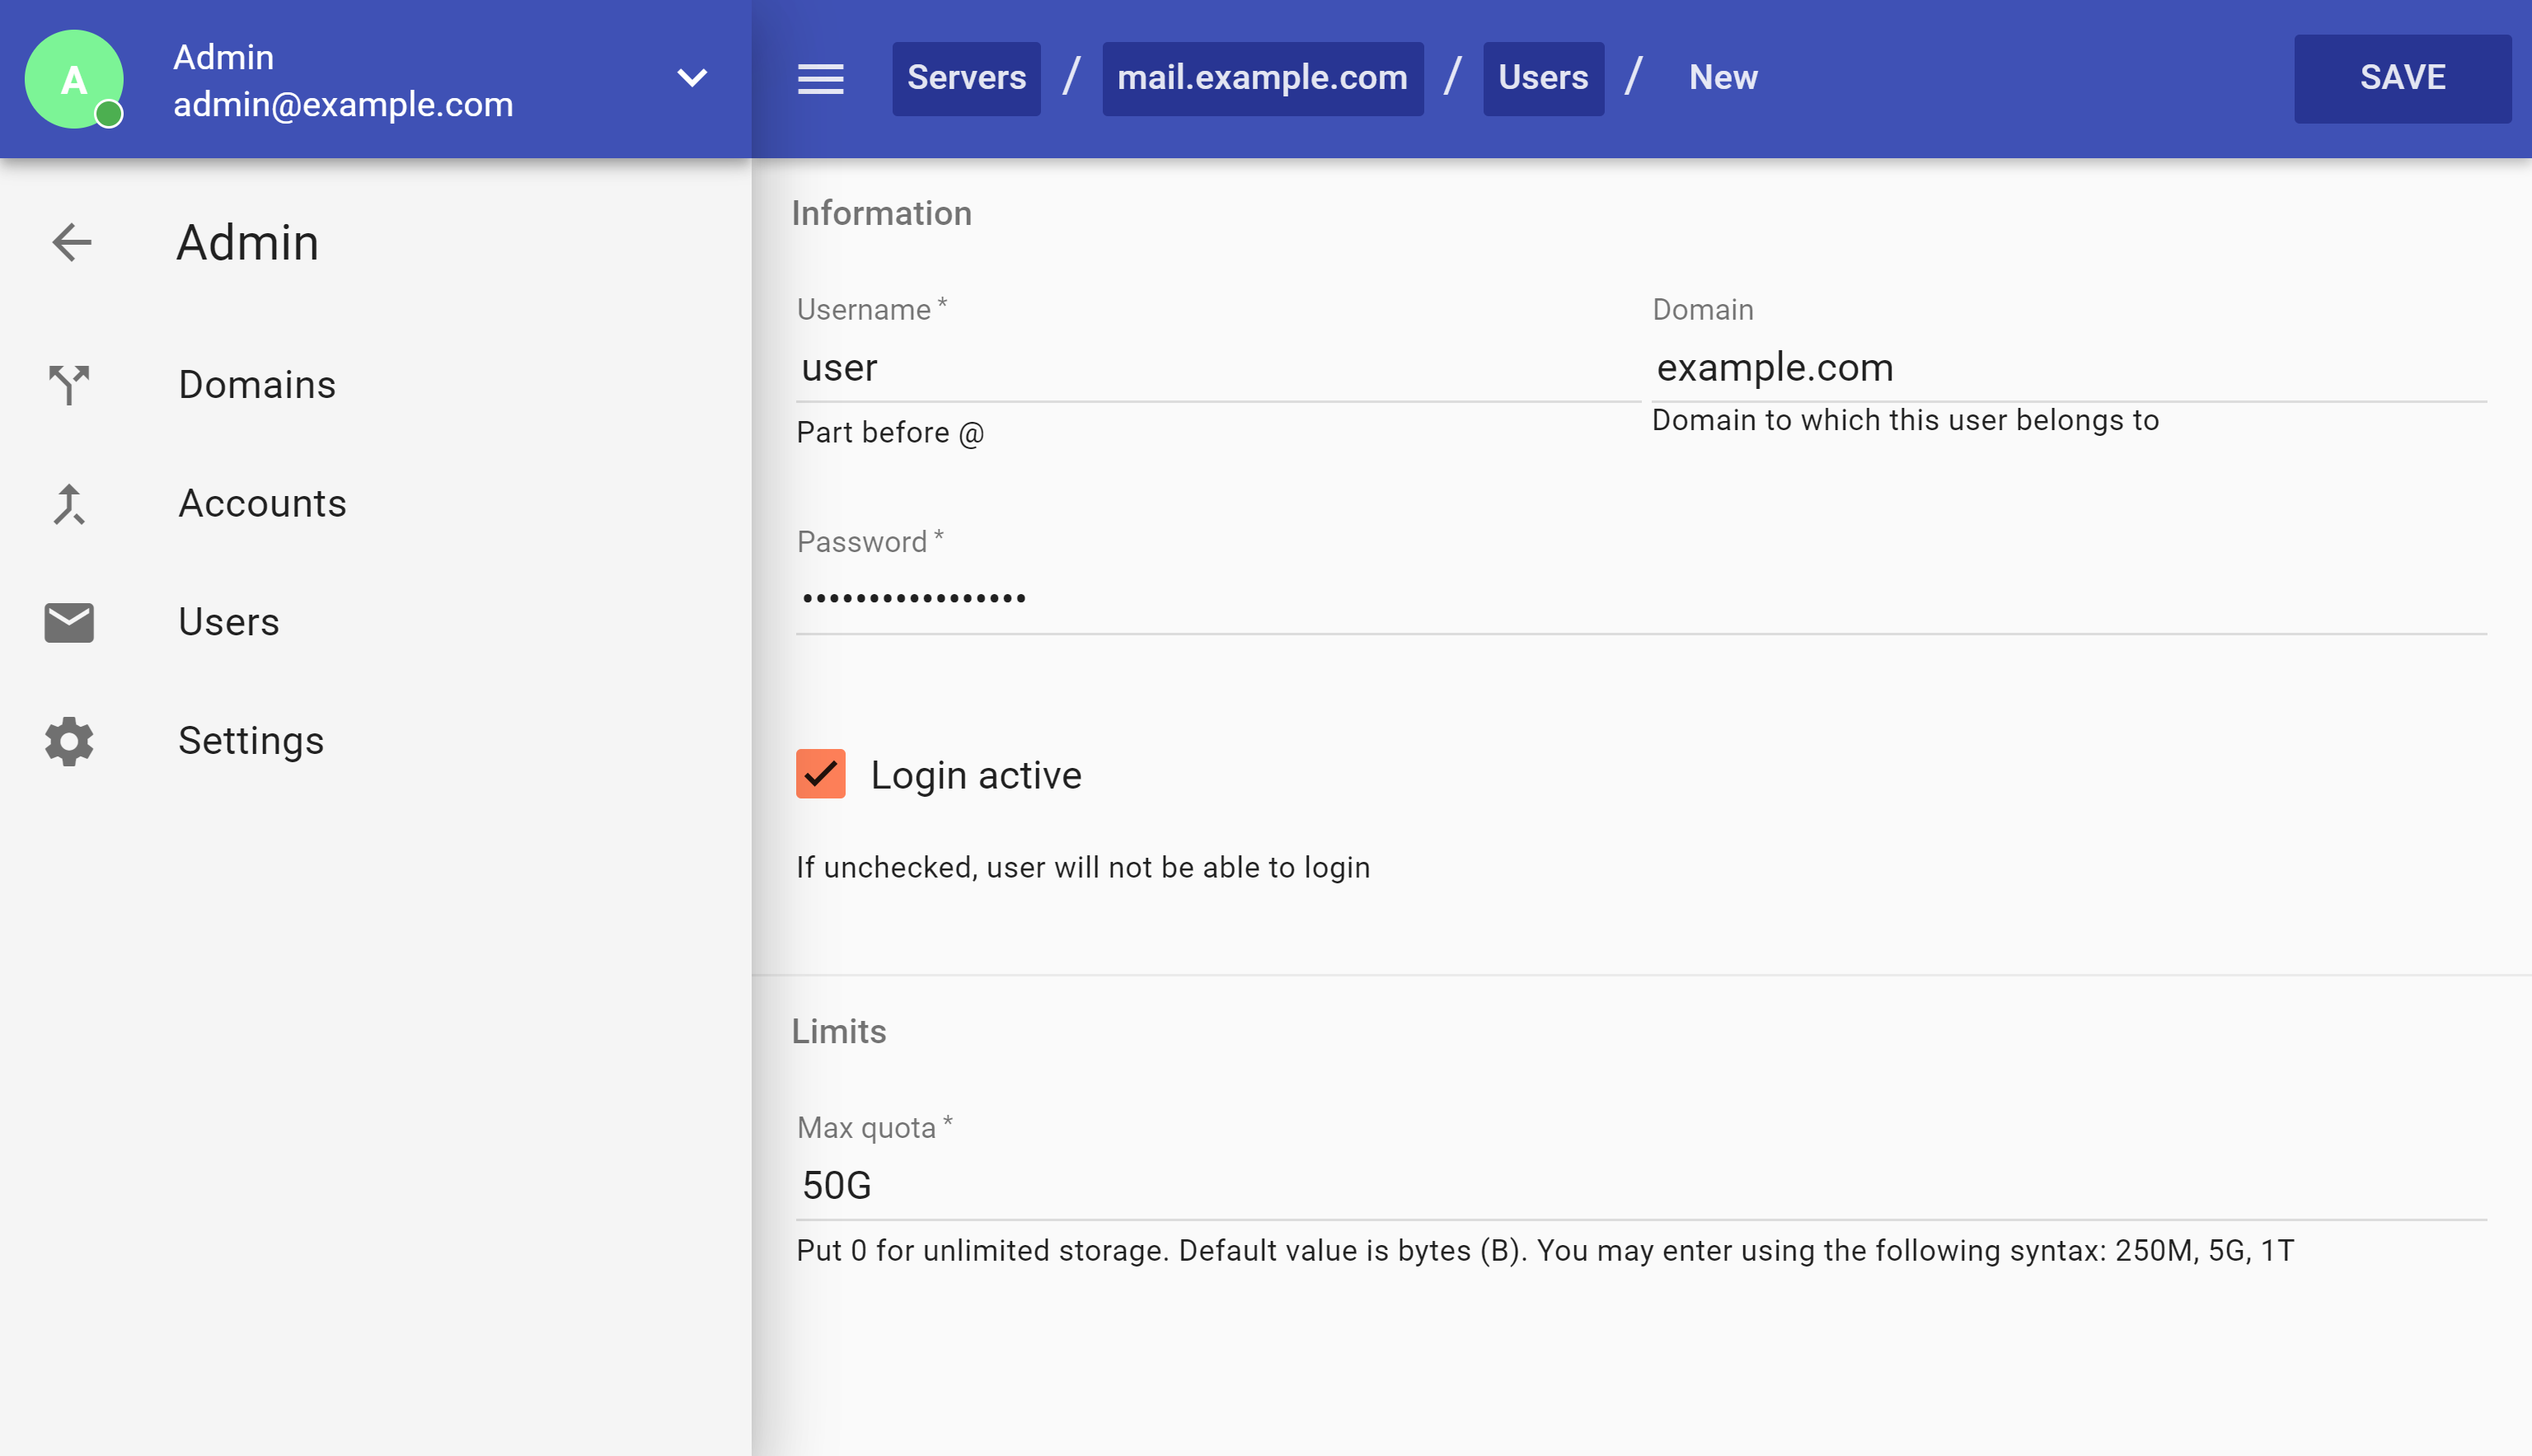
- Username is the first part of the e-mail address. For example joe.doe
- A domain is the second part of the e-mail address. For example domain.com
- Enter the password user will use to access CrossBox and IMAP/POP3/SMTP protocols
- Login active checkbox defines if a user is allowed to log in
- Max quota is a quota limit that CrossBox will not allow the user to exceed
After you click Save, the CrossBox user you specified will be created along with a fully functional e-mail address.
Managing a Server
To manage a CrossBox Server login to your Admin Area, and click on a server you wish to manage.
Easy to use Admin Interface lets you stay in full control over:
- Server status (stop/start/restart)
- Domains
- Users
- System Accounts
Changing Server's Settings
To change the CrossBox Server Options, login to your Admin Area, pick a server you wish to modify and click "Settings".
Command Line Tools
The "crossbox" CLI Command
This is the CrossBox command line utility. Use it to view status, restart services, view logs, trigger updates, and a lot more.
A root user is required to run the commands.
Monitoring
crossbox stop|start|restart|status|enable|disable
Easily stop, start, restart, enable, disable crossbox services. You can also view status of all services, for exmaple: crossbox status
Updating
crossbox update
Perform a manual update check and update the application if possible.
Logs
crossbox log [--lines]
Displays all logs in real time. If it's too verbose, try using crossbox log <service>
--lines
defines a number of "last lines" to display for each log file
Service Specific
crossbox stop|start|restart|disable|enable <service>
You can also specify several <services> by separating multiple services by space, so for example: crossbox restart redis exim
Medic
crossbox medic
CrossBox Medic will collect all the relevant CrossBox logs from your server, send them to us and give you a unique key which you can reference when requesting support.
Utility
crossbox info
Will tell you general information about your CrossBox installation.
crossbox admin password
Allows you to reset the admin's password.
crossbox admin email
Allows you to reset admin's e-mail address.
crossbox changelog
Shows latest update messages.
To view full list of crossbox commands, run crossbox -h
Debugging
You can enable the debug mode if you are faced with a bug and you want to find out more about what the application is doing.
crossbox debug disable|normal|unsafe
Use unsafe mode only when you don't see anything indicating a problem. When using the unsafe debug mode the application may leak information, so use it with care.
NOTE: Changing the debug mode will restart all CrossBox services.
Performance Tuning
CrossBox Server
Max Number of Workers
Increase the number of workers by setting Max Number of Workers to your total CPU count. This will allow CrossBox to utilize a multi-core processing. For example, if you have a server with 8 CPUs, set this to 8.
Remember that each worker also allocates 70-100 MB of RAM. Multiply this by a number of workers and you'll get the total amount of additional RAM which the change of this setting will require.
Linux Server
For a high-performance system trying to serve thousands of concurrent network clients, default Linux kernel parameters are often too low. Consider making following changes
- Increase max open files to 100,000 from the default (typically 1024). In Linux, every open network socket requires a file descriptor. Increasing this limit will ensure that lingering
TIME_WAITsockets and other consumers of file descriptors don’t impact our ability to handle lots of concurrent requests. - Decrease the time that sockets stay in the
TIME_WAITstate by loweringtcp_fin_timeoutfrom its default of 60 seconds to 10. You can lower this even further, but too low, and you can run into socket close errors in networks with lots of jitter. We will also settcp_tw_reuseto tell the kernel it can reuse sockets in theTIME_WAITstate. - Increase the port range for ephemeral (outgoing) ports, by lowering the minimum port to 10000 (normally 32768), and raising the maximum port to 65000 (normally 61000). Important: This means you can’t have server software that attempts to bind to a port above 9999! If you need to bind to a higher port, say 10075, just modify this port range appropriately.
- Increase the read/write TCP buffers (
tcp_rmemandtcp_wmem) to allow for larger window sizes. This enables more data to be transferred without ACKs, increasing throughput. We won’t tune the total TCP memory (tcp_mem), since this is automatically tuned based on available memory by Linux. - Decrease the VM
swappinessparameter, which discourages the kernel from swapping memory to disk. By default, Linux attempts to swap out idle processes fairly aggressively, which is counterproductive for long-running server processes that desire low latency. - Increase the TCP congestion window, and disable reverting to TCP slow start after the connection is idle. By default, TCP starts with a single small segment, gradually increasing it by one each time. This results in unnecessary slowness that impacts the start of every request – which is especially bad for HTTP.
Kernel Parameters
To start, edit /etc/sysctl.conf and add these lines:
# /etc/sysctl.conf
# Increase system file descriptor limit
fs.file-max = 100000

# Discourage Linux from swapping idle processes to disk (default = 60)
vm.swappiness = 10

# Increase ephermeral IP ports
net.ipv4.ip_local_port_range = 10000 65000

# Increase Linux autotuning TCP buffer limits
# Set max to 16MB for 1GE and 32M (33554432) or 54M (56623104) for 10GE
# Don't set tcp_mem itself! Let the kernel scale it based on RAM.
net.core.rmem_max = 16777216
net.core.wmem_max = 16777216
net.core.rmem_default = 16777216
net.core.wmem_default = 16777216
net.core.optmem_max = 40960
net.ipv4.tcp_rmem = 4096 87380 16777216
net.ipv4.tcp_wmem = 4096 65536 16777216

# Make room for more TIME_WAIT sockets due to more clients,
# and allow them to be reused if we run out of sockets
# Also increase the max packet backlog
net.core.netdev_max_backlog = 50000
net.ipv4.tcp_max_syn_backlog = 30000
net.ipv4.tcp_max_tw_buckets = 2000000
net.ipv4.tcp_tw_reuse = 1
net.ipv4.tcp_fin_timeout = 10

# Disable TCP slow start on idle connections
net.ipv4.tcp_slow_start_after_idle = 0

# If your servers talk UDP, also up these limits
net.ipv4.udp_rmem_min = 8192
net.ipv4.udp_wmem_min = 8192

# Disable source routing and redirects
net.ipv4.conf.all.send_redirects = 0
net.ipv4.conf.all.accept_redirects = 0
net.ipv4.conf.all.accept_source_route = 0

# Log packets with impossible addresses for security
net.ipv4.conf.all.log_martians = 1
Since some of these settings can be cached by networking services, it’s best to reboot to apply them properly (sysctl -p does not work reliably).
Open File Descriptors
In addition to the Linux fs.file-max kernel setting above, we need to edit a few more files to increase the file descriptor limits. The reason is the above just sets an absolute max, but we still need to tell the shell what our per-user session limits are.
So, first edit /etc/security/limits.conf to increase our session limits:
# /etc/security/limits.conf
# allow all users to open 100000 files
# alternatively, replace * with an explicit username
* soft nofile 100000
* hard nofile 100000
Next, /etc/ssh/sshd_config needs to make sure to use PAM:
# /etc/ssh/sshd_config
# ensure we consult pam
UsePAM yes
And finally, /etc/pam.d/sshd needs to load the modified limits.conf:
# /etc/pam.d/<g class="gr_ gr_808 gr-alert gr_spell gr_inline_cards gr_run_anim ContextualSpelling ins-del multiReplace" id="808" data-gr-id="808">sshd</g>
# ensure pam includes our limits
session required pam_limits.so
You can confirm these settings have taken effect by opening a new ssh connection to the box and checking ulimit:
ulimit -n
100000
TCP Congestion Window
Finally, let’s increase the TCP congestion window from 1 to 10 segments. This is done on the interface, which makes it a more manual process that our sysctlsettings. First, use ip route to find the default route, shown in bold below:
route
default via 10.248.77.193 dev eth0 proto kernel
10.248.77.192/26 dev eth0  proto kernel  scope link  src 10.248.77.212
Copy that line, and paste it back to the ip route change command, adding initcwnd 10 to the end to increase the congestion window:
route change default via 10.248.77.193 dev eth0 proto kernel initcwnd 10To make this persistent across reboots, you’ll need to add a few lines of bash like the following to a startup script somewhere. Often the easiest candidate is just pasting these lines into /etc/rc.local:
defrt=`ip route | grep "^default" | head -1`
ip route change $defrt initcwnd 10
Hardware
- More CPUs means more concurrency
- More than 4GB of RAM is often not required, even with high concurrency
- Faster Disk means faster IO, therefore we always recommend having an SSD
Uninstall
Run the command crossbox uninstall
This command will completely erase CrossBox from the machine, including user data generated by CrossBox.
After 10 seconds the uninstallation will begin - once this step starts you should not interrupt the script as it might not completely delete the software. Depending on the amount of work and performance of the machine the uninstallation might take from a few seconds to several minutes
Migration
Server migration
This is a guide on how to migrate the CrossBox instance to a new server
Preparation
Make sure that you do the following steps before the migration starts:
- If you are just going to move the entire disk to another machine, you should read the following guide: https://crossbox.io/documentation/page/post-machine-migration
- The new server should have rsync, ssh installed and a default public key generated
- The old server ssh public key must be added to the new server
- The new server should have the same hostname and PTR (rDNS) as the old one
- Change your A/CNAME record to the new server ip address
- On your old server, ping the new server hostname, it should resolve to the new ip address
- If you are moving CrossBox from a panel, you should first migrate the user data and the panel itself. CrossBox should be migrated last.
- Plan a complete outage of the server during the migration period for at least an hour. Speed of the process is determined by the data transfer between the old and the new server.
Steps
Run the following command on the old server:
crossbox move newhostname.comThe command will inform you what's going to happen with each step.
When migrating panel integrated installations, only CrossBox core data will be copied to the new server. The end user data will not be copied, because panel migration tools will do that for you.
Standalone, or master server / node CrossBox installations are migrated completely (excluding the situations where you have special configurations, like custom MySQL hosting, file hosting etc)
After the command completes, you will have to wait at least 10 minutes until the CrossBox recognizes the changed machine and readjusts it's internal configurations. Make sure that all needed incoming and outgoing ports are allowed.
Check the CrossBox status command to verify all services are up:
crossbox statusThe CrossBox instance should be accessible via relevant hostname and port combinations based on your installation configuration.
Post machine migration
If you just migrated your disk to another machine with a different ip, you should do the following set of commands:
crossbox config set -k public_ip_address -s "new_ip_address"
crossbox sync all
After that you should wait at least 10 minutes until CrossBox recognizes the new environment.
Then you should verify if all services are running:
crossbox statusMake sure all firewall rules are working correctly and check if the instance is accessible once again.